How to Curve Soccer Ball When Shooting
That sinking feeling when your powerful shot rockets straight into the goalkeeper’s hands—predictable and stoppable. Learning how to curve soccer ball when shooting transforms you from a linear attacker into an unpredictable scoring machine. When executed right, that magical swerve around defenders and into the net isn’t luck; it’s physics meeting precision. This guide reveals exactly how to bend the ball like a pro, whether you’re taking free kicks or cutting inside during open play. You’ll discover the biomechanics behind the curve, avoid common pitfalls that ruin your technique, and implement a progressive training system proven to build muscle memory. By the end, you’ll consistently create those jaw-dropping goals that leave keepers stranded.
Physics Behind Ball Curvature
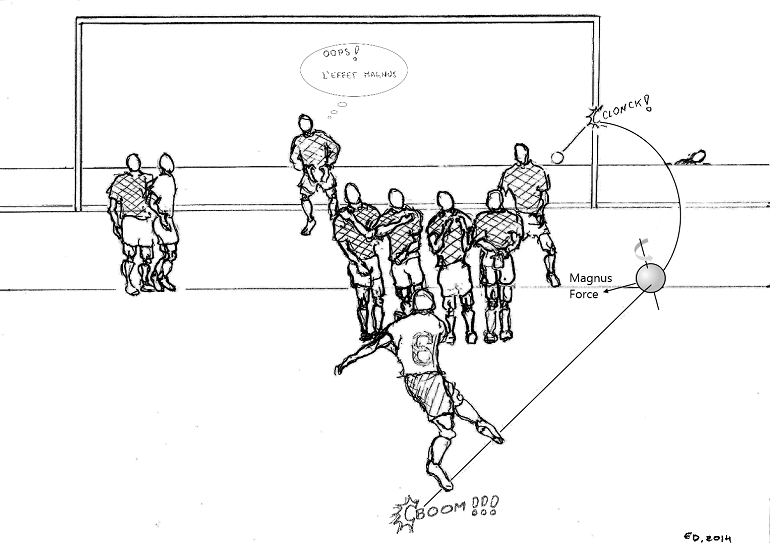
Your ability to curve a soccer ball hinges entirely on the Magnus Effect—a scientific principle where spinning air creates pressure differences. As the ball rotates, one side moves with the airflow (reducing pressure) while the opposite side fights against it (increasing pressure). This imbalance literally pulls the ball toward the low-pressure zone. Clockwise spin makes the ball curve right, counter-clockwise curves it left. Mastering how to curve soccer ball when shooting means manipulating these forces intentionally.
Key Factors Controlling Curve
Five elements determine your curve’s effectiveness:
– Spin rate: Higher rotation speed = sharper bend (aim for 8-10 full rotations per 20-yard flight)
– Ball speed: Maintain 60-70% power—too slow loses spin, too fast sacrifices control
– Contact point: Strike 2-3 inches off-center for clean spin generation
– Foot surface: Inside foot creates smoother curves; laces generate aggressive swerve
– Approach angle: A 30-45° run-up optimizes your swing path geometry
Ignoring any factor causes inconsistency. Wet grass? You’ll need to increase spin rate by 20% to compensate for reduced friction.
Body Position for Perfect Curves

Your stance dictates everything. Stand with non-kicking foot 6-8 inches beside the ball, toes pointing toward your target zone. Keep your chest slightly over the ball while locking eyes on your contact point—this prevents the “leaning back” mistake that sends shots sky-high. Extend your arms like airplane wings for balance. Most amateurs rush this phase, but pros spend 3 full seconds perfecting alignment.
Curve Direction Body Alignment
Right-footed inswingers (curving left): Approach from the ball’s right side at 45°. Plant your left foot pointing 10-15° right of the target. Open your hips 15° toward the goal to create the swing path. This setup generates counter-clockwise spin for that signature Beckham curl.
Right-footed outswingers (curving right): Approach from a 20° left angle. Plant foot parallel to your target line. Rotate hips slightly away from the goal to close your body position. This creates clockwise spin that bends away from defenders—perfect for far-post finishes.
Foot Contact Mastery
Ankle lock is non-negotiable. Keep it rigid from backswing through follow-through to transfer maximum energy. For inside-foot curves, turn your striking foot inward like you’re kicking a pebble; for laces shots, point toes down aggressively. The difference between a gentle arc and a knuckleball lies in millimeters of contact adjustment.
Ball Contact Sweet Spots
Standard curves: Target the lower third for lift, contacting 2-3 inches right of center (right-footed) or left (left-footed). Imagine the ball as a clock face—strike at 4:30 for left curves, 7:30 for right curves.
Knuckleball effect: Hit dead center with minimal follow-through for unpredictable movement. Use this sparingly—it sacrifices curve consistency for chaos.
Surface Selection Guide
Instep (laces): Generates maximum power and spin for 25+ yard shots. Requires perfect timing—mistime it, and you’ll send rockets into the stands.
Inside foot: Your go-to for controlled placement shots within 18 yards. Sacrifices power for surgical accuracy around defensive walls.
Outside foot: Creates deceptive reverse curves that fool keepers expecting standard spin. Master this for last-second near-post bends.
Step-by-Step Shooting Process
1. Approach Run Setup
Take 5-7 steps back at a consistent 35° angle—never straight on. Accelerate smoothly, with your final step 10-15% longer to build momentum. Mark your starting point with grass blades; pros never guess their run-up distance. Inconsistency here causes 70% of failed curves.
2. Plant Foot Precision
Land your plant foot 7 inches beside the ball (measured heel-to-ball). Point toes 12° right of target for left curves. Keep the knee slightly bent—not locked—to absorb impact. If your plant foot drifts closer than 6 inches, you’ll lose power and spin.
3. Backswing Preparation
Swing your kicking leg back fully with a 90° knee bend. Rotate hips away from the ball while keeping shoulders square to the target. Your upper body should remain stable—no wild arm swings. This coiled position stores energy for explosive contact.
4. Strike Execution
Swing through in a smooth C-shaped arc, not straight at the ball. Contact with your chosen foot surface while maintaining eye contact through impact. Drive your hips forward aggressively—this hip thrust creates 40% of your curve force. Decelerating before contact kills spin.
5. Follow-Through Finish
Let momentum carry your leg across your body line. Rotate hips completely through the shot and land naturally on your kicking foot. Hold your finish for 2 seconds—this ensures full energy transfer and builds muscle memory. Rushing this step causes weak, straight shots.
Advanced Curve Techniques
Banana Shot Mastery
For extreme curves from 20+ yards, approach at 60°. Strike the ball at 5 o’clock position (right-footed) with full instep contact. Follow through high across your body like a tennis serve. This generates 8-10 feet of horizontal deviation—enough to bend around entire defensive walls. Use sparingly; it sacrifices accuracy for drama.
Dip and Curve Combination
Strike slightly below center while applying topspin with your side spin. The ball rises over the wall then drops sharply under the crossbar—a deadly combo for free kicks. Requires perfect timing: contact 1 inch below center with a downward-follow-through motion.
Fix Common Curve Mistakes
Straight Ball Problems
Problem: Ball flies straight despite your efforts
Solution: You’re hitting the center. Place tape 2 inches right of center on the ball and practice striking that exact spot. Film yourself to verify contact point.
High Curve Issues
Problem: Ball curves beautifully but sails over the bar
Solution: Lower your plant foot by 1 inch and strike the middle third. Keep your chest over the ball through impact—leaning back kills trajectory control.
Power Loss Solutions
Problem: Curve works but lacks goal-threatening power
Solution: Maintain acceleration through contact. Practice “power curves” by placing a cone 2 feet behind the ball—your foot must clear it before striking.
Progressive Training System
Beginner Drills (Weeks 1-2)
Stationary wall practice: Stand 5 yards from a wall. Fire 20 shots daily focusing solely on consistent curve direction. Mark each shot’s impact point with chalk—your goal is 15+ shots hitting within a 2-foot circle. Track progress in a notebook.
Target cone setup: Place three cones 10 yards away in an arc (left post, center, right post). Practice curving around each cone. Start close (10 yards), moving back 2 yards weekly. Hit 80% of shots through the gaps before advancing.
Advanced Game Simulation (Weeks 5-6)
Pressure situations: Add a passive defender who closes down space after your third dribble step. Practice curving shots within 1.5 seconds of receiving the ball. This replicates real-game urgency where hesitation ruins technique.
Distance variations: Master three critical distances:
– 18 yards: Use inside foot for precision
– 25 yards: Instep with 70% power
– 30 yards: Full-power laces strikes
Record success rates—aim for 60% accuracy at 25 yards before match play.
Injury Prevention Protocol
Dynamic Warm-Up (13 minutes)
Skip static stretches—dynamic movements prime muscles for explosive curves. Start with 5 minutes of leg swings (front/back and side-to-side). Follow with 5 minutes of wall passes at increasing power. Finish with 3 minutes of single-leg balances while juggling—this activates ankle stabilizers critical for clean contact.
Strengthening Routine
Weak ankles sabotage curve consistency. Perform single-leg calf raises (3×15) daily to build strike stability. Add resistance band rotations (3×20 per direction) to strengthen the foot’s spin-generating muscles. These take 7 minutes but prevent the “wobbly ankle” that turns potential bends into skiers.
Final pro tip: Master one curve direction completely before attempting the opposite. Your dominant-foot inside curve should hit 80% accuracy at 20 yards before adding outside-foot techniques. Consistency beats variety—focus on perfect repetition until the motion is automatic. When you finally bend that free kick around the wall and into the top corner, you’ll understand why mastering how to curve soccer ball when shooting separates casual players from goal-scoring threats. The keeper never saw it coming—and that’s exactly how it should be.

I come from the “soccer heart” of Germany, the Ruhrpott. I have played, trained and followed soccer all my life and am a big fan of FC Schalke 04. I also enjoy following international soccer extensively.