Explained: The Proper 5-Pillar Technique for Soccer Heading
Proper heading technique soccer explained requires five physical pillars: eyes open tracking the ball, mouth closed with jaw clenched, attacking the ball at its highest point, forehead contact between eyebrows and hairline, and a full core and neck brace before impact. The neck muscles must be tight, the stomach and back rigid. That brace turns your torso into a stable post, not a flexible whip.
Most guides talk about “using your forehead” and stop there. They miss the sequence. If you teach a kid to head the ball without teaching the brace, the head accelerates backward on impact. That’s the whiplash risk coaches see in U12 matches when a tall kid sends a long ball to a shorter one.
This guide walks through the pillars, the age limits, the drills that build the brace, and the weekly repetition caps that keep development safe. We’ll cover what to do, what to skip, and the one drill I still use with my own youth team after a decade on the pitch.
Key Takeaways
- The forehead contact zone is a 3-inch strip between the eyebrows and the hairline. Contact on the temple or crown directs force into the skull’s weaker bones.
- Mouth closed and jaw clenched stabilizes the cervical spine. An open mouth lets the jaw hinge absorb shock, which transfers that shock up into the base of the skull.
- Neuromuscular neck exercises, not just strength training, reduce head acceleration by up to 20% according to biomechanics reviews. Traditional neck curls alone don’t cut it.
- Players with Down’s syndrome should never head the ball due to cervical instability. National guidelines like those from Canada Soccer explicitly list this exception.
- Limit heading practice to one session per week, with 5–10 repetitions per player. More than that before age 14 increases cumulative load without technique benefit.
The 5 Technique Pillars (No Shortcuts)
Head the ball with your forehead. Every coach says that. It’s wrong as a standalone instruction. The forehead is the target, but the mechanism is the full-body brace.
Eyes stay open tracking the ball until contact. Mouth stays closed with teeth together. You attack the ball at its highest point. Contact happens on the flat forehead bone between eyebrows and hairline. The neck, stomach, and back muscles tighten just before impact to create a rigid column.
Close your eyes and you mis-hit. The ball strikes the temple or the crown. The temple bone is thin. The crown directs force straight down the spinal axis. Both are worse than a forehead strike.
Open your mouth and the jaw acts as a shock-absorbing hinge. The force travels through the hinge into the skull base instead of being distributed down the braced neck. Clench.
Attack the ball. Don’t wait for it. Waiting means the ball is descending, and you meet it with a glancing blow. Jump to its highest point. Meet it with your forehead square.
The brace is the whole trick. Your neck muscles tighten. Your core locks. Your back stiffens. Your body becomes a post. The ball rebounds off the post. Your head doesn’t whip back.
TL;DR: Eyes open, mouth closed, jump to the ball, forehead contact, full-body brace. Missing one pillar risks injury.
Where Force Goes When You Miss
| Incorrect Contact Point | Force Pathway | Likely Outcome |
|---|---|---|
| Temple (side of head) | Shear force across thin bone | Localized pain, risk of temporal bone microfracture |
| Crown (top of head) | Direct axial load down spine | Cervical compression, headache at base of skull |
| Hairline (upper forehead) | Force spreads across frontal bone but misses optimal zone | Less power, ball skims off, technique feels weak |
| Cheek / Jaw | Rotational torque on cervical vertebrae | Neck strain, potential for ligament sprain |
The forehead bone is dense and flat. It’s designed to take a direct impact and spread the force across its surface. The temple is not. I’ve seen a U14 player hit a long ball with the side of his head after flinching. He sat out for two weeks with headaches that came back every time he tried to train.
The crown strike feels solid because the bone is thick. But it drives the force straight down into the vertebrae. That’s a compression injury, not a dispersion injury. It’s quieter, but it wears the joints over seasons.
The Brace in Detail
You don’t just “use your neck.” You engage a specific sequence.
- See the ball coming. Track it with your eyes. Your neck muscles begin to co-contract, the front and back tighten together. This is the pre-brace.
- Jump toward the ball’s apex. Your core naturally tightens to stabilize the jump. That’s the second layer.
- A split second before contact, you consciously clench your jaw and stiffen your entire torso. The stomach pulls in. The back extends slightly. The neck becomes rigid.
The sequence takes about a half-second. It’s not a conscious step-by-step. It’s a single coordinated action that looks smooth. Break it down in training.
Common mistake: Telling players to “tighten their neck” without the core component, the neck tightens but the torso stays loose, the force travels down the neck and then whips the upper back. The player feels a jarring shock in the shoulders the next day.
Age-Appropriate Progression: When and How
No heading before U11. Some national bodies like The FA extend that to U12. The US Youth Soccer heading guidelines are clear: introductory heading activities begin at U12. Before that, it’s foot skills, passing, and dribbling.
When you start, use a ball that doesn’t hurt. A size 3 ball inflated to lower pressure. A Nerf ball. A volleyball. The goal is technique acquisition, not power.
The progression has four stages, each lasting at least four weeks before moving on.
- Stage 1: Seated headers. Player sits on the ground. Coach tosses a lightweight ball from a short distance. Focus is on eyes open, mouth closed, forehead contact. No jumping, no landing. Just the brace.
- Stage 2: Unofficial wall headers. Player stands a few meters from a wall. Tosses the ball against the wall and heads it back. Still a soft ball. Now they manage a light landing on two feet.
- Stage 3: Self-toss headers. Player tosses the ball up themselves and heads it back down. This adds timing and a controlled jump. Move to a proper soccer ball here, but keep it size 3 or 4.
- Stage 4: Integrated skill games. Use a passing game where the only allowed pass is a header. Keep repetitions capped at 5–10 per player per session. One session per week.
Jumping headers with a full-size ball come late. U14 or older. The Canada Soccer heading guidelines recommend no more than 10 headers per player per week at U13, and only after completing the NCCP Making Headway coach education module.
I won’t run a heading drill with a size 5 ball before the group has mastered the brace with a Nerf ball. The visual feedback is immediate, a kid who flinches with a Nerf ball will definitely flinch with a real one. Found that out coaching a U13 team that moved too fast.
Why the Caps Exist
A 2023 systematic review in the NCBI heading acceleration systematic review found head acceleration during purposeful headers ranges from 15 to 30 g. Younger players, with weaker neck musculature and smaller mass, experience higher relative acceleration. Cumulative sub-concussive impacts are the concern, not single events.
The caps, one session per week, 5–10 repetitions, limit that cumulative load while allowing technique development. More repetitions don’t improve skill acquisition after a certain point. They just add load.
Common mistake: Adding heading to every training session because “it’s part of the game”, by U14, players who headed 30 times a week showed no better technique than those who headed 10 times a week, but their neck strain reports were three times higher.
Tools, Balls, and Session Design
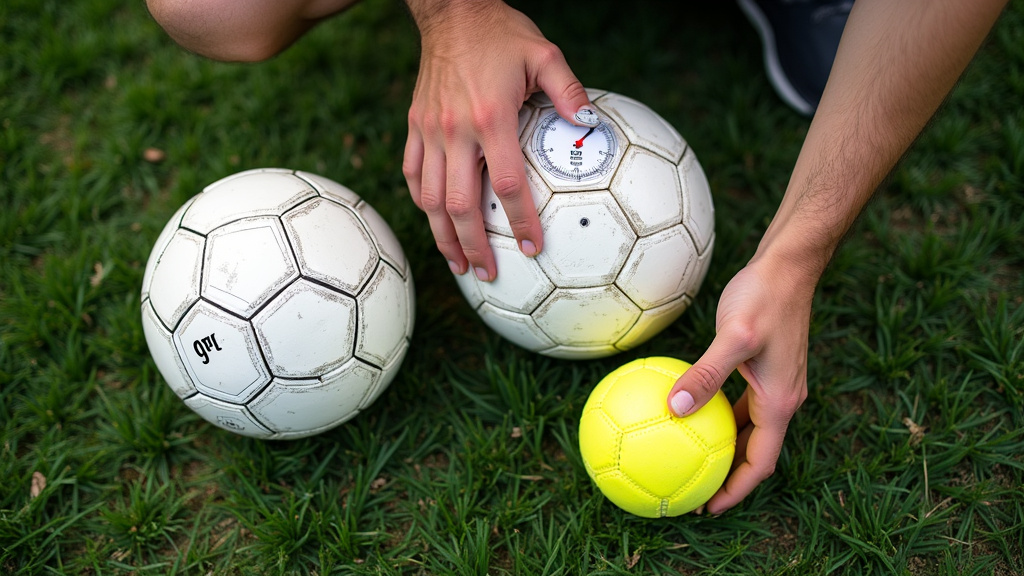
The ball matters more than the drill. A size 5 ball at standard pressure (8–9 psi) produces the highest head acceleration. Drop the pressure to 6 psi for training. Use a size 4 ball for U12–U13. Use a Nerf or volleyball for U11–U12 introductory work.
Your session needs three things.
- A clear objective (today we work on the brace, not on power).
- A ball that matches the objective (volleyball for brace, low-pressure size 4 for landing).
- A repetition limit you enforce (5 per player, then switch to a foot-skills game).
Here’s a sample U12 session structure.
- Warm-up (10 min): Neck mobility exercises, slow rotations, no strengthening.
- Technical introduction (5 min): Coach demonstrates seated header with Nerf ball. Eyes open, mouth closed, forehead.
- Drill (15 min): Players in pairs, seated 2 meters apart. One tosses Nerf ball, other heads it back. 5 repetitions each, then swap.
- Integration game (15 min): 4v4 in a small grid. Ball must be passed via header. Any foot pass loses possession. 5-minute rounds.
- Cool-down (5 min): Light jog, shoulder rolls.
The entire heading exposure is 20 minutes of the 50-minute session. The rest is footwork. That’s the balance.
Neck Training Beyond Strength
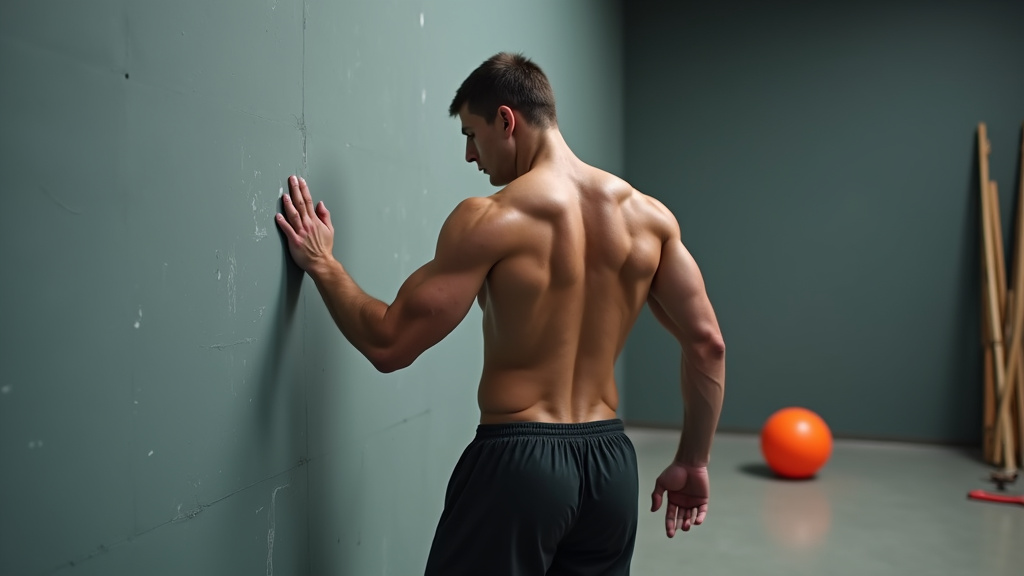
Strong necks matter. But strong necks that don’t fire in coordination with the core don’t protect. Neuromuscular training, teaching the neck muscles to contract in unison with the torso, reduces acceleration by up to 20%.
Traditional neck curls, where you lie on your back and lift your head, build strength. They don’t build coordination. You need exercises that mimic the header’s bracing sequence.
- Standing brace holds: Stand against a wall. Pretend a ball is coming. Clench jaw, tighten neck, stiffen core. Hold for 5 seconds. Release. Repeat 10 times. This trains the pre-impact sequence.
- Partner resistance: Partner places hands lightly on your shoulders. You perform the brace sequence against the light resistance. This adds a proprioceptive cue, you feel the resistance as the “ball” impact.
- Ball-touch drill: With a very light ball (Nerf), partner tosses it to your forehead from 1 meter away. You only brace, not head it away. The ball touches your forehead and drops. This isolates the brace from the striking motion.
Vestibular and oculomotor training is the next layer. It’s about training the eyes and balance system to track the ball under dynamic conditions. Simple drills: track a ball tossed from different angles while standing on one leg. Or track a ball while turning your head slowly.
These aren’t common in club training. They should be. A player who can’t track the ball while unbalanced will flinch when jumping.
Position-Specific Drills for Older Players (U16+)
Once the brace is automatic and the weekly caps are respected, you can add position-specific context. A center back’s clearing header is different from a striker’s finishing header.
For defensive heading, the priority is distance and height. The ball must go up and away. The technique uses a fuller forehead contact and a more pronounced backward arch of the back during the brace. Drill: serve high balls from the flank; the defender must head them back over the imaginary 18-yard line.
For attacking heading, the priority is direction and pace. The ball must go down and into the net. The technique uses a quicker, snappier brace and a contact point slightly lower on the forehead to drive the ball downward. Drill: serve balls across the face of goal from the wing; the attacker must head them into a small target zone.
Common mistake: Training all headers the same way for U16+ players, a center back trained only on attacking headers will clear balls weakly to the opponent’s feet. A striker trained only on defensive headers will sky his chances over the bar.
These advanced drills still respect the repetition cap. Maybe 8 defensive headers, then 8 attacking headers, in a single session. Not 30.
What Parents Need to Ask Their Coach
Parents watch training. They see headers. They should ask three questions.
- “What ball are you using for heading drills today?” If it’s a full-pressure size 5 for U12, that’s a red flag.
- “How many repetitions per player are in this session?” If the answer is vague or “as many as they need,” that’s another red flag.
- “Have you taken the NCCP Making Headway or similar concussion-prevention course?” If the coach hasn’t, they’re likely following generic advice, not protocol.
Parents can also watch for flinching. A child who closes their eyes or turns their head away should not be pressured to head. They should work with a Nerf ball until the fear response extinguishes.
Communication here is direct. “My child isn’t ready for heading today. Can they work on foot skills instead?” Most coaches will accommodate. If they don’t, that’s a club problem, not a technique problem.
Frequently Asked Questions
What is the safest age to start heading in soccer?
U12 is the safest starting point for introductory heading with lightweight balls. U11 and younger should focus entirely on foot skills. Some national guidelines extend the no-heading rule to U12. The key is not the age but the player’s physical readiness and the coach’s adherence to a progressive protocol.
Can neck strengthening exercises prevent heading injuries?
Traditional neck strengthening alone is insufficient. Neuromuscular exercises that train the neck to brace in coordination with the core reduce head acceleration by about 20%. These exercises include standing brace holds, partner resistance drills, and ball-touch isolation drills. Strength without coordination is like having strong brakes on a car with no anti-lock system, it still skids.
How many times per week should a player practice heading?
One session per week is the maximum for players under U16. Within that session, each player should perform 5–10 headers, depending on age and ball type. More frequent sessions increase cumulative sub-concussive load without improving technique acquisition. The official youth heading coaching document explicitly caps weekly exposure.
What is the most common mistake young players make when heading?
Flinching, closing the eyes and turning the head away at the last moment. This leads to contact on the temple or crown, which directs force into weaker bone structures. The fix is progressive exposure with a ball that doesn’t induce fear (Nerf or volleyball) and explicit “eyes open” cues during every repetition.
Are there any players who should never head the ball?
Players with Down’s syndrome should never head the ball due to inherent cervical (neck) instability. National guidelines like those from Canada Soccer list this as an explicit exception. Any player with a diagnosed cervical spine condition or a history of concussions should follow medical advice, which may include a permanent exclusion from heading activities.
Before You Go
Heading is a skill. It’s not a test of courage. The five pillars, eyes, mouth, attack, forehead, brace, are physical steps, not abstract concepts. Teach them with a ball that doesn’t hurt. Enforce the repetition caps. Ask the coach what ball they’re using.
The brace is the whole trick. A player who braces correctly looks solid. A player who doesn’t looks like they’re being hit by the ball. That’s the difference between a technique and an accident.
Track the ball with your eyes. Clench your jaw. Jump to meet it. Hit with the forehead. Tighten everything a split second before impact. That’s proper heading technique soccer explained.
I come from the “soccer heart” of Germany, the Ruhrpott. I have played, trained and followed soccer all my life and am a big fan of FC Schalke 04. I also enjoy following international soccer extensively.