How to Improve First Touch in Soccer: Tips & Drills
Your first touch makes or breaks more soccer plays than any other technical skill. That split-second contact when the ball meets your foot determines whether you’ll maintain possession, beat a defender, or create a scoring chance. Every elite player—from Messi’s velvet cushions to De Bruyne’s one-touch lasers—built their game on mastering this fundamental skill. If you’ve ever watched your carefully placed pass sail past teammates or felt the frustration of losing possession immediately after receiving, you need these proven techniques. This guide delivers actionable drills and position-specific applications that directly translate to match performance, helping you transform from a player who merely stops the ball to one who controls the game.
Fix Heavy Touches With Precision Wall Work
Most players struggle with heavy first touches because they don’t practice cushioning properly. The wall is your most powerful training tool for developing consistent first touch—no partners required, just unlimited repetitions that build muscle memory faster than any other method.
Master the Inside Foot Cushion Technique
The inside foot provides your largest, most forgiving surface for ball reception. Stand 5-7 yards from the wall, lock your ankle with toes slightly up, then withdraw your foot slightly upon contact to absorb momentum. Your goal: direct the ball 2-3 feet from your body, setting up your next action.
Critical wall work progression:
– Start with two-touch: control, then pass back to wall (50 reps each foot)
– Advance to one-touch passing (100 clean touches each foot)
– Add movement: approach the wall at different angles before receiving
– Introduce weak foot emphasis: equal reps on non-dominant side
Pro tip: Place a small cone target where you want the ball to land after your touch. Hitting this consistently builds spatial awareness that transfers directly to game situations.
Control Aerial Balls Like a Pro Striker
Balls arriving through the air present unique challenges that kill many promising attacks. The difference between a professional and amateur often shows in how they handle these high balls—while amateurs let the ball drop unpredictably, pros control trajectory immediately.
Three-Step Aerial Control Method
Follow this sequence when controlling balls from the air:
- Judge early: Track the ball’s flight path from the passer’s foot
- Position correctly: Plant supporting foot 12-18 inches from landing spot, knees bent
- Choose technique: Select from these options based on pressure:
– Half-volley cushion: Let ball drop slightly, cushion with instep
– Chest trap: Arch back slightly, create concave surface, drop to feet
– Thigh trap: Raise leg to hip height, immediately drop to control
Warning: Never try to catch the ball with your foot—this creates a heavy touch. Instead, let the ball drop slightly onto your receiving surface for maximum control.
Position-Specific First Touch Drills

Your position demands different first touch applications. Generic training won’t translate to match performance—you need position-specific scenarios that replicate real-game demands.
Striker: Turn Defender Drill
Setup: Place two cones 5 yards apart. Have a passer 15 yards away.
Execution:
1. Check away from cone
2. Receive pass with first touch across your body
3. Turn defender’s side (use body as shield)
4. Shoot or pass immediately
Key focus: Your first touch should create shooting space—not just stop the ball but direct it into space where you can get a clean shot.
Midfielder: Pressure Reception Circuit
Setup: Create 10×10 yard grid with partner and defender applying 50% pressure.
Progression:
1. Receive stationary with immediate return pass
2. Add movement: receive while jogging backward
3. Introduce defender applying light pressure
4. Require scanning before reception
Pro tip: Count how many times you check shoulders before receiving. Elite midfielders scan every 2-3 seconds—build this habit from your first touch drills.
Eliminate Common First Touch Mistakes
Heavy touches, poor body positioning, and panic under pressure sabotage more players than lack of talent. Fix these issues with targeted corrections that address the root cause.
Stiff Ankle Syndrome Fix
Problem: Rigid ankle creates unpredictable bounces that lose possession.
Solution: Daily ankle mobility work plus these corrective steps:
– Practice with smaller balls (size 3-4) for better sensitivity
– Do 3 sets of 20 ankle alphabet exercises with resistance bands
– Focus on relaxed foot upon contact—imagine your foot as a sponge
– Start barefoot on grass to develop natural foot feel
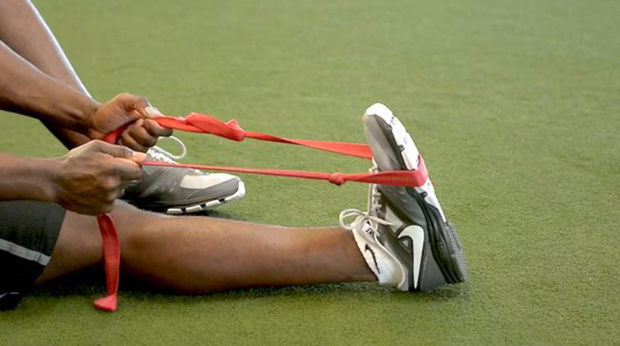
Warning: Ignoring ankle flexibility limits your first touch potential more than any other physical factor. Dedicate 5 minutes daily to ankle work—your touch will transform.
Build Elite First Touch Under Pressure
Real games happen under pressure—you must train your first touch to function when defenders close in. Generic solo drills won’t prepare you for match intensity.
Progressive Pressure Training System
Phase 1 (Beginner): Partner lightly jogs toward you after passing—control and return before they reach you.
Phase 2 (Intermediate): Defender applies 50% pressure—must maintain possession for 3 seconds after reception.
Phase 3 (Advanced): Full pressure with immediate challenge—first touch must create space to turn.
Critical success factor: Keep your body positioned between defender and ball upon reception. Drop your hips, lower center of gravity, and use your arms for balance while shielding.
Core Strength Secrets for Better Ball Control
Your first touch depends more on core stability than foot skill alone. Weak core muscles cause balance issues that lead to inconsistent touches, especially when receiving while moving.
10-Minute Daily Core Circuit
Complete this sequence before training sessions:
- Plank variations: 3 sets of 45 seconds (standard, side, dynamic)
- Single-leg stability: 30 seconds each leg on unstable surface
- Russian twists: 3 sets of 15 with medicine ball
- Hip flexor work: 3 sets of 15 each leg
Pro tip: Test your single-leg balance weekly—goal of 60 seconds per foot indicates sufficient stability for elite first touch under pressure.
One-Touch Passing Integration Drill
Transform your first touch from simple control into creative playmaking. This drill builds the pre-scanning habits and timing that separate good players from great ones.
Setup: Triangle formation with two partners (10 yards between each)
Execution:
1. Scan before ball arrives—identify passing lane
2. Receive with one touch directly into passing lane
3. Move immediately to new position
4. Repeat continuously for 2 minutes
Progression: Add defender applying light pressure after 30 seconds of clean play. The key is maintaining one-touch quality even as pressure increases.
Warning: Never force one-touch play when it’s not appropriate—develop the judgment to know when to take an extra touch versus playing immediately.
Mastering first touch transforms your entire game. Start with 30 minutes daily using these progressions, track your wall work consistency weekly, and watch your confidence explode. Remember: every world-class player built their touch one repetition at a time. Your journey starts with your next ball contact—make it count. Implement just one drill consistently for 21 days, and you’ll notice immediate improvements in your ability to receive under pressure, maintain possession, and create scoring opportunities from seemingly impossible situations. The difference between good and great soccer players isn’t talent—it’s the quality of their first touch. Take control of your game starting today.

I come from the “soccer heart” of Germany, the Ruhrpott. I have played, trained and followed soccer all my life and am a big fan of FC Schalke 04. I also enjoy following international soccer extensively.