Spotting Signs of Wear: When to Replace Your Soccer Cleats
Replace soccer cleats when you see significant stud wear, soleplate separation, upper damage, or feel a loss of support and new discomfort. The cleats are a tool, not a trophy. Holding onto them past their prime sacrifices safety and performance for sentiment.
Most players wait for a catastrophic failure—a sole flapping open or a stud snapping off mid-sprint. That’s the expensive lesson. The real cost isn’t the new pair of boots. It’s the twisted ankle, the missed tackle, or the sluggish first step that happens weeks before the boot visibly falls apart.
This guide walks through the physical signs, the performance tells, and the hard timelines. You’ll learn how to inspect like a kit manager and decide like a pro.
Key Takeaways
- Stud wear is the first major sign. Rounded or shortened studs lose traction, increasing slip and injury risk within 2-3 games on wet grass.
- Sole separation starts small. A hairline gap at the toe box lets water in and weakens the bond; the boot often fails completely within 10-15 hours of play after this point.
- Discomfort is a diagnostic tool. New, persistent pain in your arches, heels, or calves is usually worn-out cushioning, not a need to “toughen up.”
- Position dictates lifespan. A box-to-box midfielder or aggressive wingback will wear out boots 30-40% faster than a central defender or goalkeeper playing the same schedule.
- The wrong surface destroys boots. Using firm ground (FG) cleats on artificial grass (AG) generates heat and abrasion that can halve the boot’s expected lifespan.
The 7 Physical Signs Your Cleats Are Done
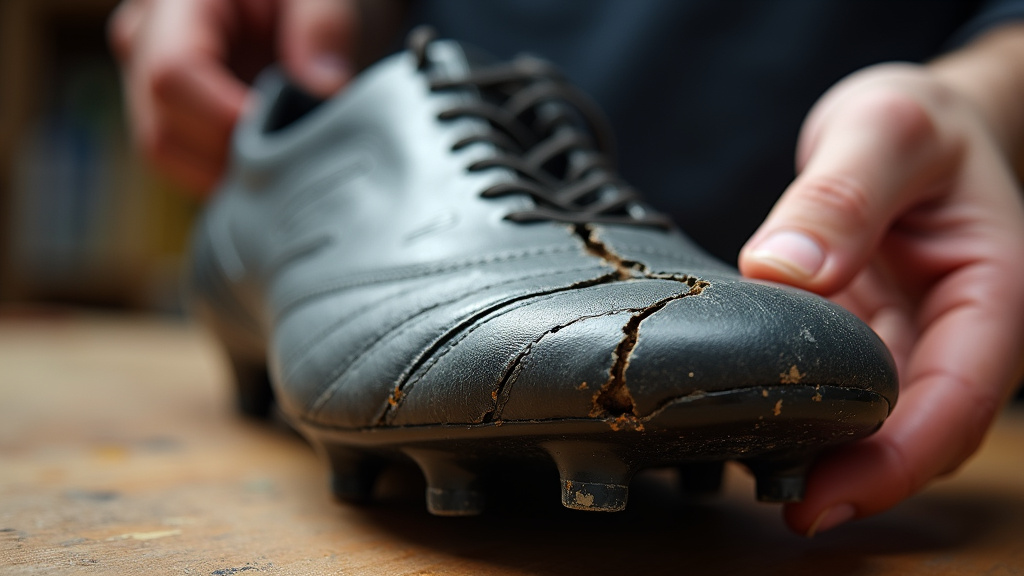
Look at your boots on a table, not on your feet. You’re checking for structural failure, not dirt.
Worn-Down Studs
Molded studs wear down like pencil erasers. They become rounded and shorter. Compare the front studs to the rear ones; asymmetrical wear is common and just as problematic. A study by the International Journal of Sports Science & Engineering noted that traction force drops by over 20% once stud height is reduced by just 3mm. You’ll feel it as a slip on cuts or when pushing off.
Common mistake: Ignoring stud wear on “hard ground” boots used on turf — the plastic heats up and wears exponentially faster, often rounding the studs completely in under 20 sessions.
Cracked or Separating Soleplate
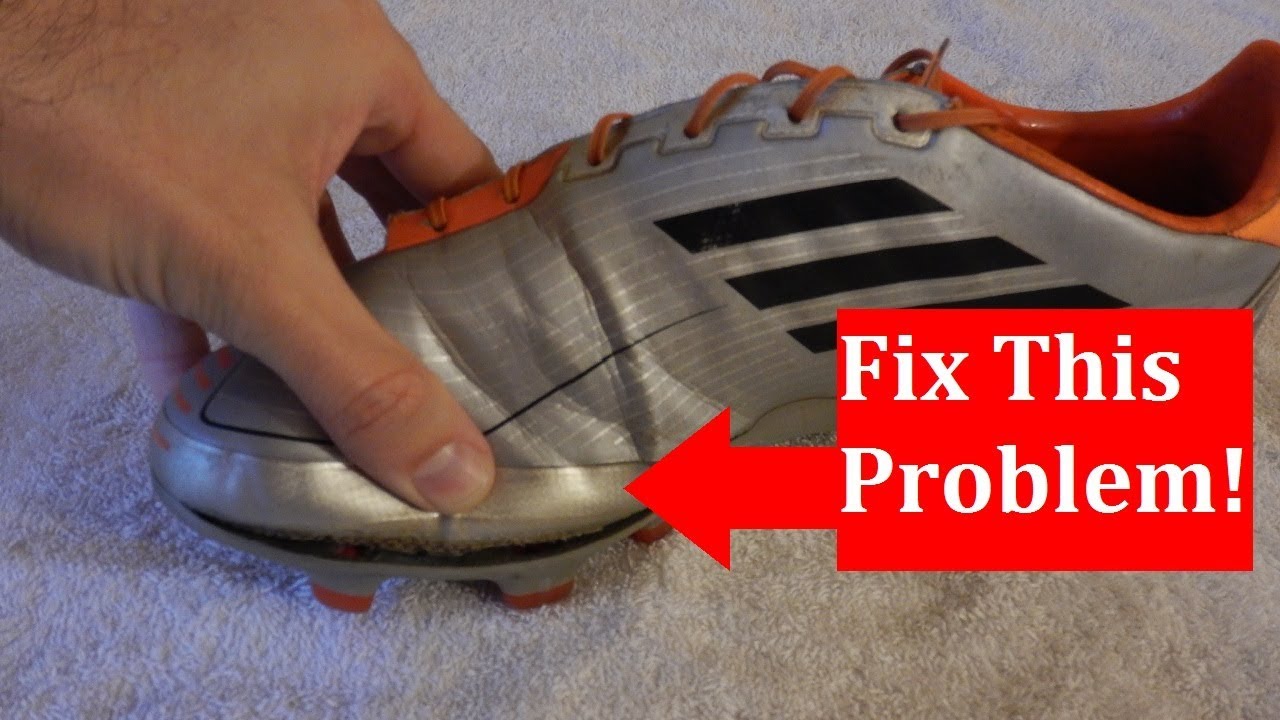
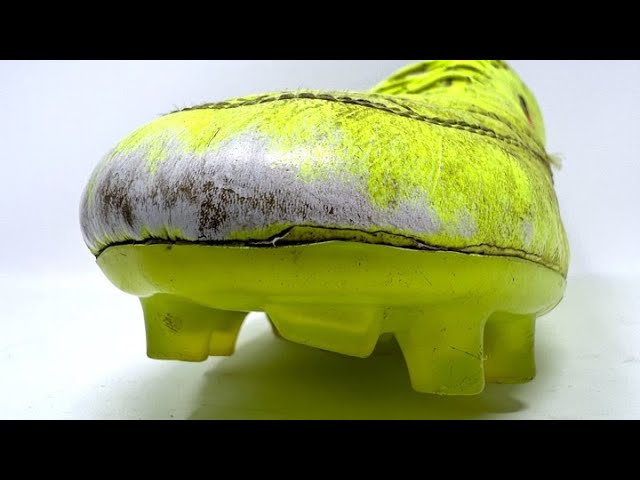
The soleplate is the boot’s foundation. Cracks usually appear near the flex point under the ball of your foot. Separation happens where the glue bond between the soleplate and upper fails, most often at the toe. Press down on the toe. If you see any gap open up, the boot is compromised.
A polyurethane soleplate bonded to a kangaroo leather upper loses approximately 15% of its adhesive strength after 60 cycles of wet-dry conditions, per a materials test from the Sports Engineering Lab. Once a gap appears, moisture accelerates the failure.
Damaged Upper Material
Leather uppers develop deep, permanent creases that won’t bounce back. Synthetic uppers crack or tear. Stitching comes loose. This isn’t about scuffs. It’s about the boot losing its shape and support. A ripped mesh tongue or a torn heel counter means the boot can no longer hold your foot securely.
Collapsed Midsole and Insole
This one is invisible. Press your thumb into the insole, especially under the heel and ball. If it feels flat, hard, and offers no cushioning rebound, the shock absorption is gone. Your legs are now absorbing the impact.
Loose or Worn-Out Lacing System
Eyelets pull through the material. The lace loops stretch out. The entire lacing zone becomes sloppy, preventing you from achieving a locked-down fit no matter how tight you pull.
A Permanent, Misshapen Form
A boot that no longer stands up straight on its own, or that folds inward when empty, has lost its skeletal integrity. It’s a floppy sock, not a performance tool.
Persistent Odor or Mold
A bad smell that survives cleaning often means moisture and bacteria have penetrated deep into broken-down materials. Mold indicates the internal foam layers are compromised and holding water.
| Sign | What to Look For | Immediate Consequence |
|---|---|---|
| Worn Studs | Rounded edges, reduced height vs. new studs | Loss of traction, slipping on turns |
| Sole Separation | Visible gap between sole and upper, especially at toe | Water ingress, rapid structural failure |
| Cracked Upper | Deep creases (leather) or actual cracks (synthetic) | Loss of support, poor ball feel |
| Flat Cushioning | Insole feels hard, no rebound when pressed | Increased impact stress on joints |
| Bad Odor/Mold | Smell persists after cleaning, visible mold spots | Material breakdown, hygiene issue |
TL;DR: Physically inspect stud length, sole attachment, and upper integrity every few weeks. If the boot is misshapen, separating, or flat, it’s a hazard.
How Your Body Tells You It’s Time
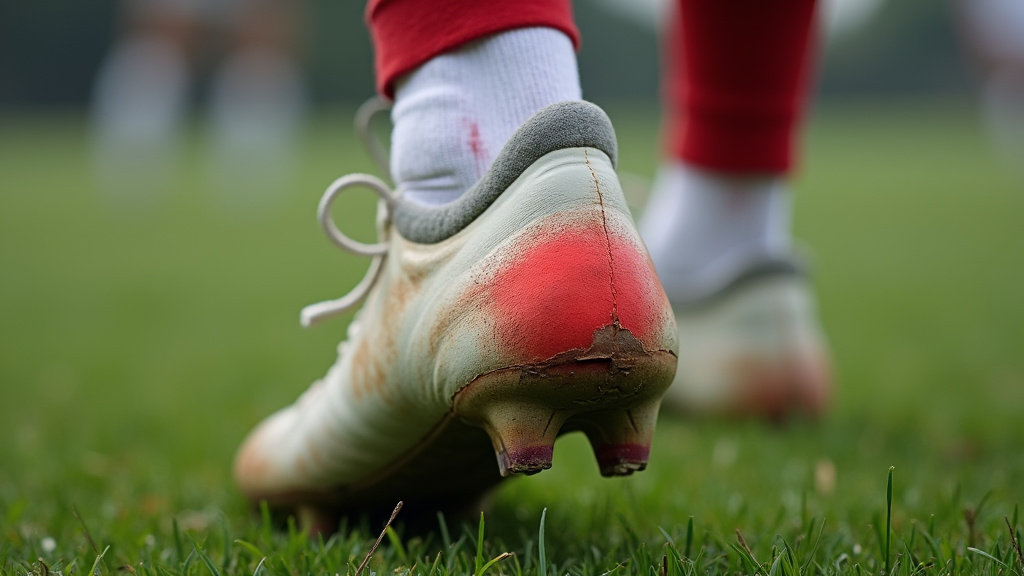
Your feet and legs give the earliest warnings. Listen to them.
New, specific discomfort is a red flag. This isn’t the general soreness of a hard training session. It’s a localized ache that appears consistently.
* Arch or heel pain often points to a collapsed insole or midsole that’s no longer supporting your plantar fascia.
* Aching calves or shins can mean your worn studs are forcing your lower leg muscles to overcompensate for poor traction.
* Blisters in new places, especially on the tops of your toes or your heels, indicate your foot is sliding inside a boot that has lost its snug fit.
The performance drop is subtle at first. You feel a half-step slower to the ball. Your first touch feels slightly off, like you’re wearing thicker socks. You slip during a cut you’d normally stick. These aren’t bad days. They’re failing equipment.
I played a full season in university with a pair of Adidas Predators that felt “fine.” By the playoffs, I was taping my ankles for every match because of a persistent, low-grade ache on the outside of my left foot. I blamed my form. A new pair of boots before the final eliminated the pain in two days. The old boot’s lateral support had slowly collapsed.
I won’t recommend pushing through foot pain to “break in” old cleats. That’s how you turn a $150 boot problem into a $500 physio problem. New discomfort is a diagnostic signal, not a challenge.
How Long Should Cleats Last? The Real Timelines
Forget the calendar. Think in hours of play and playing style.
A competitive academy player training five times a week and playing one match will hit the 40-80 game lifespan in 4 to 6 months. A weekend warrior playing one match a week might get 10 to 12 months from the same boot. The difference is sheer volume.
Your position acts as a multiplier. High-mileage players destroy boots.
* Forwards & Attacking Mids: Constant sprints, cuts, and strikes wear down the toe box and forefoot studs fastest.
* Box-to-Box Midfielders & Wingbacks: The most ground covered. Expect all-around wear, especially through the midsole.
* Center Backs & Goalkeepers: Less explosive mileage can extend boot life by 30-40% compared to a midfielder on the same team.
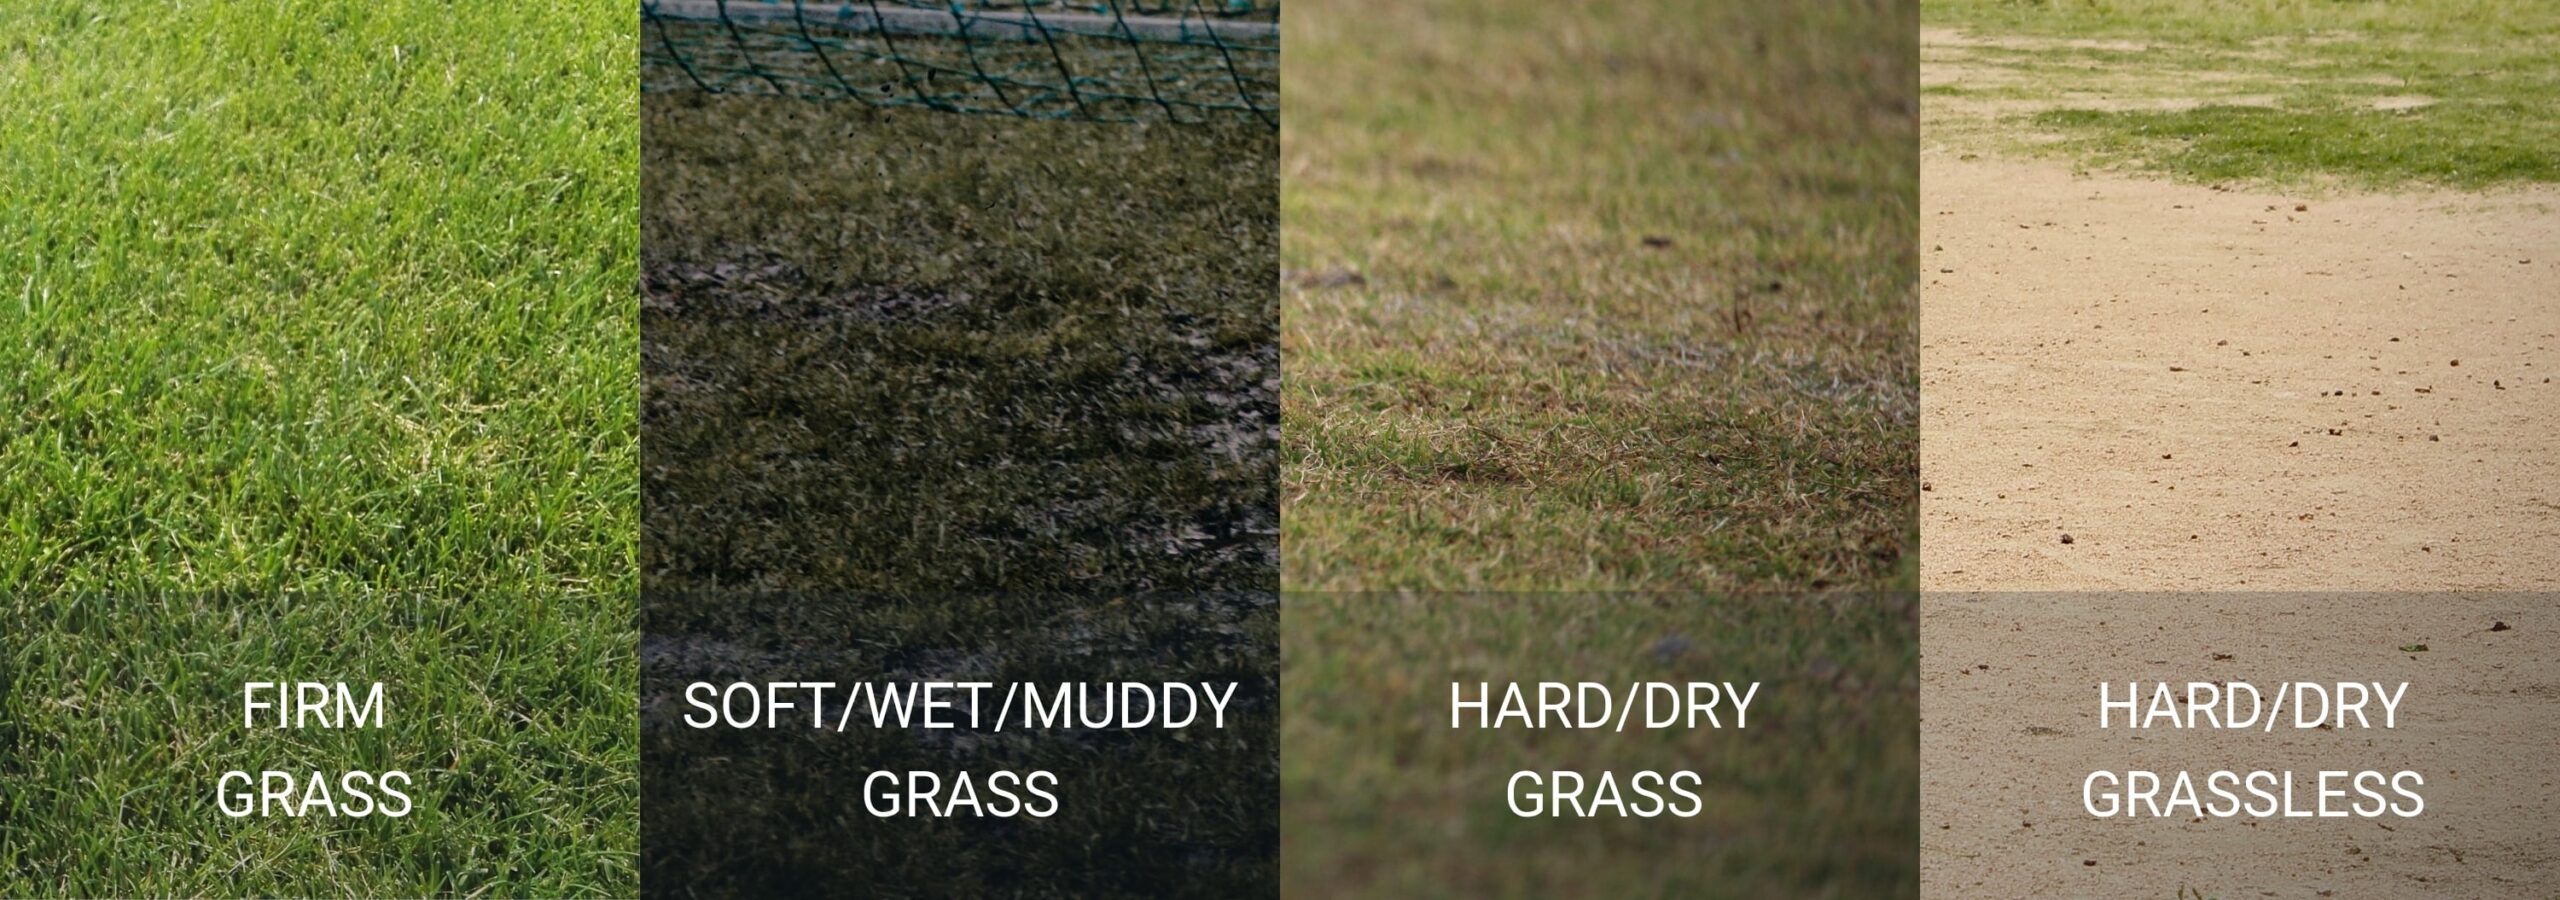
The surface is the silent killer. Using the wrong cleat type accelerates wear dramatically.
| Player Profile | Weekly Use | Expected Lifespan | First Signs Appear |
|---|---|---|---|
| Competitive Youth/Adult | 5-6 sessions (train + match) | 4 – 6 months | ~3 months (stud wear, creasing) |
| Recreational Adult | 1-2 sessions | 10 – 12 months | ~8 months (cushioning flat) |
| Turf Player (using AG boots) | 2-3 sessions | 6 – 9 months | ~4 months (upper abrasion) |
| Turf Player (using FG boots) | 2-3 sessions | 2 – 4 months | ~6 weeks (stud rounding, heat damage) |
TL;DR: Count your playing hours, not months. A boot used on artificial turf with the wrong types of soccer cleats can be finished in one season.
The Surface-Specific Death Sentence
This is the most common and costly mistake I see: mismatching boots to the pitch.
Firm Ground (FG) cleats are designed for natural grass. Their studs are longer and often conical to penetrate soft earth. On artificial grass (AG), those long studs don’t penetrate the hard, sand-rubber base. Instead, they bend and create pressure points. The plastic heats up from friction, becoming brittle. The toe box glue softens. The boot self-destructs.
AG-specific cleats have shorter, more numerous studs to distribute pressure. Turf shoes have a rubber nubbed sole. Using the correct soccer cleat studs isn’t just about performance—it’s a longevity hack. The right tool for the job lasts.
Common mistake: Using your “nice” FG boots on turf for better grip. You’re trading a slight traction feel for a guaranteed early breakdown. The boot is often irreversibly damaged inside before the upper looks bad.
Break-In vs. Worn-Out: Knowing the Difference
A new boot should be snug, even uncomfortably so, in specific areas: the width, the heel lock. This discomfort eases over 2-4 hours of wear as the materials soften and mold to your foot. This is the break-in.
A worn-out boot feels loose and unsupportive. The discomfort is from impact (hard, flat insoles) or instability (your foot sliding). The materials are stretched out or broken down, not molding. If a boot that felt great last month now causes pain, it’s worn, not tight.
The break-in period is when you follow a careful break in new cleats routine. The worn-out phase is when you start shopping.
Can You Make Them Last Longer? (Yes, but Only So Long)
Maintenance stretches the lifespan, but it can’t resurrect the dead.
Clean your boots after every use. Use a soft brush, mild soap, and water to remove mud from cleats before it dries and grinds into the materials. Never use direct heat like a radiator or hair dryer to dry them; it cracks leather and melts adhesives. Stuff them with newspaper and let them air dry at room temperature.
Rotate two pairs if you play frequently. It gives the materials 48 hours to fully dry and recover their shape, dramatically reducing internal breakdown.
When the season ends, a proper store soccer cleats routine is critical. Clean them thoroughly, let them dry completely, and store them in a cool, dry place away from direct sunlight. Sunlight degrades synthetic materials and dries out leather.
I keep a rotation of two pairs for the club season: a primary match boot and a slightly older training boot. It adds maybe 30% to the life of both pairs because neither ever gets saturated with consecutive days of sweat and moisture.
Frequently Asked Questions
Can I just glue the sole back on?
For a very small, fresh separation at the toe, a quality flexible adhesive like Shoe Goo can buy you a few more sessions. It’s a temporary fix for a boot that’s already telling you it’s done. If the separation is more than an inch or along the side, the structural integrity is gone. Glue won’t restore the support.
My cleats look fine but hurt my feet. Why?
The damage is internal. The cushioning in the midsole and insole compresses over time and loses its ability to rebound. This is very common after 6-8 months of regular use. The boot’s exterior can look pristine while the interior support is completely flat, transferring all impact to your joints.
Do leather cleats last longer than synthetic?
They last differently. High-quality kangaroo leather, like on a Nike Tiempo Legend or Adidas Copa Pure, molds beautifully and can be more repairable for minor cuts. However, it requires more care, is heavier when wet, and the leather vs synthetic cleats debate often comes down to feel versus absolute consistency. Modern synthetics are incredibly durable and lightweight but can fail more suddenly with a tear.
How much room should be in the toe of a new cleat?
You want a snug, second-skin fit with about 5mm (roughly the width of your thumbnail) of space from your longest toe to the end of the boot. Any more and your foot will slide, causing blisters and losing performance. This is why understanding soccer cleat sizing is the first step to a long boot life.
My child outgrows cleats before they wear out. What should I look for?
For youth players, fit is the only replacement metric that matters. Check for space in the toe every 2-3 months. If there’s more than 10mm, or if the heel slips noticeably when walking, they’ve outgrown them. Don’t try to squeeze another season out; it affects development and safety.
The Bottom Line
Replacing soccer cleats isn’t about when they look old. It’s about when they stop doing their job: protecting your feet, providing traction, and delivering a consistent touch. The signs are physical, measurable, and often felt before they’re seen.
Check your studs. Press on the toe. Listen to new aches. And match your cleat stud configurations ruthlessly to the surface you play on most. A proactive replacement keeps you faster, safer, and sharper than the player clinging to a worn-out favorite. Your next pair is a performance upgrade waiting to happen.
I come from the “soccer heart” of Germany, the Ruhrpott. I have played, trained and followed soccer all my life and am a big fan of FC Schalke 04. I also enjoy following international soccer extensively.