How to Clean Soccer Shin Guards: Pro Tips for Fresh Gear
How to clean soccer shin guards requires a simple, regular process. Remove inserts, soak in cool water with mild detergent, and scrub with a soft brush for foam or a firm one for plastic. Rinse thoroughly and air-dry completely away from direct heat to preserve materials and performance.
Clean soccer shin guards by first removing all parts, then soaking them in cool water with mild detergent, scrubbing with appropriate brushes, rinsing thoroughly, and air-drying completely away from heat. Match your cleaning tools to the material: a soft brush for foam, a firmer one for hard plastic shells, and never use a machine dryer.
Most players wait until the smell is unbearable. That’s the problem. By then, the bacteria colony living in the sweat-soaked foam has a permanent address. You’re not just cleaning dirt; you’re evicting tenants that cause skin irritation and degrade the foam’s shock absorption.
This guide walks through the exact process for every shin guard type, from basic slip-ins to models with integrated ankle support. You’ll get the step-by-step deep clean, a rundown of what products actually work, and the critical mistakes that warp plastic and ruin padding.
Key Takeaways
- Hand wash foam-padded guards; machine washing can shred the lining and damage adhesives within three or four cycles.
- Air dry only, every single time. Heat from a dryer or radiator shrinks and hardens foam, destroying its protective quality permanently.
- Inspect for cracks during cleaning. A clean guard lets you spot stress fractures along the plastic shell that are invisible under dirt.
- Disinfect after every use with a vinegar-water spray to prevent odor from taking root between deep cleans.
- Match your brush to the material: a soft toothbrush for foam, a firmer nail brush for hard TPU shells.
Why Just Wiping Them Down Isn’t Enough

Sweat and impact create a perfect habitat inside your shin guard. The moisture gets trapped against your skin, then soaks into the foam liner. Without a proper clean, that damp foam grows bacteria and mold spores. You’ll notice the smell first. What you won’t notice is the slow breakdown of the foam’s cell structure, which is what actually absorbs the shock from a tackle.
A 2023 textile hygiene study published in the Journal of Sports Sciences found that synthetic sports foams can harbor Staphylococcus bacteria populations for over 72 hours post-exercise if not disinfected. This is a direct vector for skin infections like folliculitis.
Wiping the plastic shell gets the mud off. It does nothing for the ecosystem inside. Regular deep cleaning is a non-negotiable part of shin guard fit and protection, as critical as choosing the correct shin guard size in the first place.
TL;DR: Surface cleaning misses the bacteria in the foam, which causes odor, skin issues, and degrades the guard’s protective padding over time.
The 5-Step Deep Clean Method for Any Shin Guard

This process works for every material. The differences are in the tools and drying time.
Step 1: Disassemble and Dry Brush. Take off every removable part. Straps, Velcro closures, and any fabric sleeves come off. If you have a slip-in vs ankle guard design with a built-in sleeve, you’ll often find a plastic insert inside. Remove it. Go outside and knock the guards together to dislodge dried mud and grass. This keeps your sink from clogging.
Step 2: The Soak. Fill a clean basin or sink with cool water. Hot water can set protein-based stains (sweat) and weaken adhesives. Add a tablespoon of a mild, dye-free liquid detergent. For heavy odor, add two tablespoons of baking soda. Submerge the guards fully. Let them soak for at least 30 minutes. For a neglected pair, several hours is fine. The water will turn a murky gray-brown. That’s the grime leaving the foam.
Step 3: Scrub by Material. This is where people use the wrong tool and damage their gear.
* Hard Plastic/TPU Shell: Use a firm-bristled nail brush or dish brush. Scrub the exterior in circular motions to dig mud out of textured surfaces and ventilation holes. This is the step from the YouTube tutorial with the Smart Armor S1 Pro guards—scrubbing the shell aggressively is safe.
* Foam Padding/Liner: Use a soft-bristled toothbrush. Gently work the soapy water into the foam. Don’t scrub hard or you’ll tear the foam cells. For stains on the surface, apply a paste of baking soda and water directly, let it sit for five minutes, then gently brush.
Step 4: The Rinse. Hold the guards under cool, running water. Rinse until the water runs completely clear and you see no more soap bubbles. For foam-padded guards, gently squeeze them (don’t wring) to help flush soap from deep inside the padding. This step is as important as the wash. Soap residue left in the foam will attract more dirt and can irritate skin.
Step 5: Dry with Absolute Certainty. This is the most failed step. Pat the guards dry with a clean, absorbent towel. Get as much moisture out as you can. Then, place them in a well-ventilated area with good air flow. A fan on low speed pointed in their direction is ideal. Never, ever place them on a radiator, in a clothes dryer, or in direct sunlight. The heat melts the foam’s internal structure. It becomes brittle and loses its cushion. It might look dry in an hour, but dense foam can hold moisture at its core for a full day. Wait 24 hours before storing them in your gear bag for equipment.
Your Cleaning Toolkit: What Works and What Ruins Gear

You don’t need specialty products. You need the right ones from your kitchen and laundry room.
| Product | Best For | Risk If Misused |
|---|---|---|
| Mild Liquid Detergent | General cleaning, breaking down sweat and dirt. | Harsh detergents with dyes or perfumes leave residues that irritate skin and break down foam faster. |
| Baking Soda | Odor neutralization, gentle abrasive for stain paste. | Can be abrasive if scrubbed too hard on delicate foam surfaces. |
| White Vinegar | Disinfecting, breaking down mineral deposits, neutralizing alkaline odors. | Never use at full strength; always dilute 1:1 with water. Acid can degrade some plastics over time. |
| Oxygen Brightener | Boosting stain removal in a soak, especially for white fabrics or sleeves. | Can sometimes fade dark colors on fabric sleeves if soaked too long. |
The YouTube tutorial used Nelly’s Laundry Soda and an oxygen brightener for a hot water soak. That works for a deep reset on very dirty guards, but for regular maintenance, the detergent-and-baking-soda soak in cool water is safer for the materials.
Common mistake: Using bleach or heavy-duty cleaners — the chemicals degrade the plastic’s polymer chains and the foam’s elasticity. The guard becomes brittle and cracks on the next hard impact.
Your best detergent for uniforms is usually a safe bet for shin guards too. Look for sports-specific or hypoallergenic formulas. The principles of proper soccer jersey cleaning apply here: cold water, mild soap, no fabric softener.
Stain & Odor Removal Arsenal
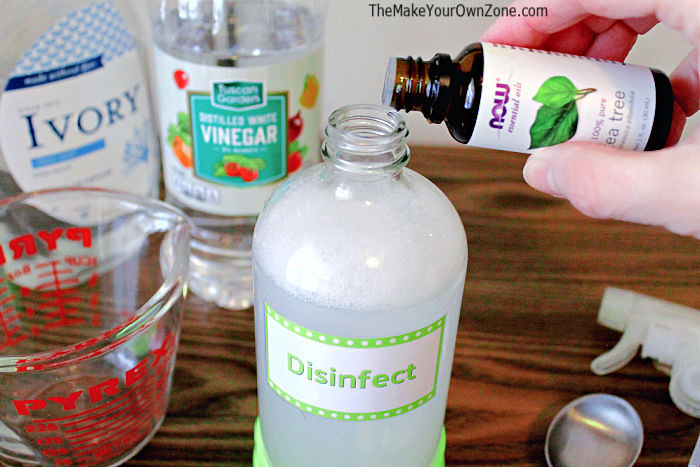
Grass stains and locker-room smell need a targeted approach.
For Grass Stains: Make a thick paste with baking soda and a few drops of water. Apply it directly to the stain on the plastic shell or fabric sleeve. Let it sit for 15-20 minutes. The baking soda acts as a gentle abrasive and lifts the chlorophyll. Scrub with your soft brush, then rinse. For set-in stains, a 50/50 mix of white vinegar and water sprayed on the stain before pasting can help break it down.
For Persistent Odor: After the deep clean and before drying, use one of these methods:
1. Baking Soda Sprinkle: While the foam is still slightly damp, sprinkle a thin layer of baking soda directly onto the padding. Let it sit overnight, then brush or shake it out the next day.
2. Vinegar Disinfectant Spray: Mix one part white vinegar with two parts water in a spray bottle. Lightly mist the interior foam after every use and before air-drying. The acetic acid kills odor-causing bacteria without leaving a strong vinegar smell once dry.
3. Essential Oil Spray: Add 5-10 drops of tea tree or lavender oil to a small spray bottle filled with water. Tea tree oil has natural antibacterial properties. Lightly spray the interior after cleaning. Do not use on skin if you have allergies.
4. Activated Charcoal Pouches: After the guards are completely dry, place a small pouch of activated charcoal inside each one when you store them in your bag. It absorbs ambient moisture and any lingering odors.
Odor means bacteria. If a smell persists after all this, the foam’s core may be compromised. It might be time to consult a shin guard selection guide for a replacement.
Material-Specific Rules: Foam, Plastic, and Sleeves
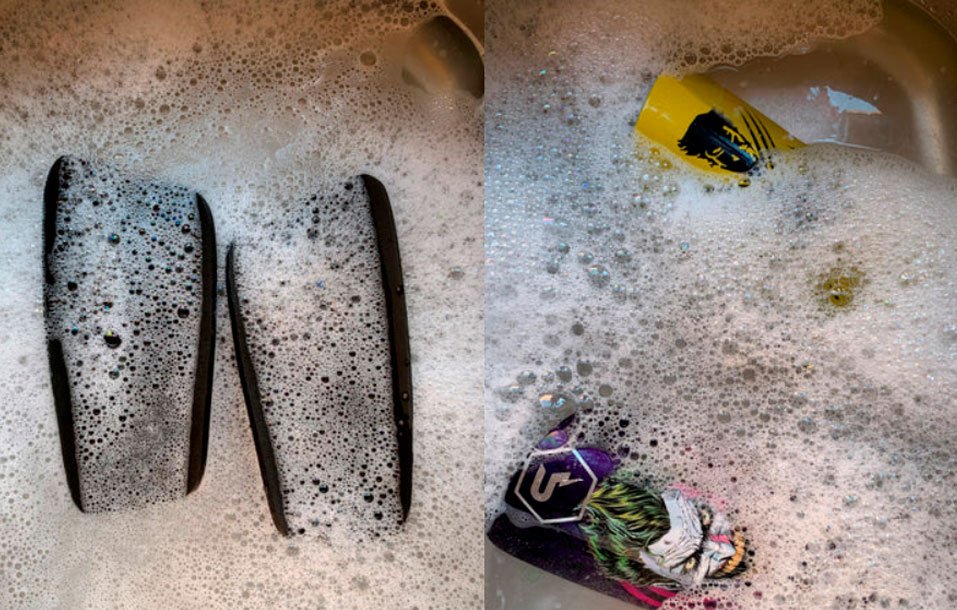
Not all shin guards are created equal, and neither is their care.
Foam-Padded Guards (Most Common): The foam is the vulnerability. Hand wash only. Never machine wash—the agitation shreds the foam’s surface and separates it from the plastic shell. Press water out, don’t twist. Drying takes the longest; be patient.
Hard Plastic Shells (like TPU): These are durable. You can use a firmer brush. Avoid abrasive kitchen scrubs or steel wool, which will scratch the surface. A diluted vinegar wipe-down after scrubbing disinfects and shines.
Guards with Fabric Sleeves: If the sleeve is removable, take it off and wash it separately. If it’s sewn on, wash the whole guard gently by hand. Do not machine dry the sleeve; the heat can shrink it, making the guard impossible to fit into. This is a common end for otherwise fine guards.
Integrated Ankle Support Models: These often have complex curves and extra padding. Pay special attention to drying. Use a dry towel to blot moisture from the crevices around the ankle bone. Stuffing the ankle area loosely with a dry paper towel can help wick moisture from deep inside while it air-dries. Ensuring a proper shin guard wearing technique also starts with clean, dry, and comfortable gear.
What Never to Do: The Quick Ruin Guide
Some mistakes have immediate, irreversible consequences.
- The Dishwasher. It seems logical. It’s a disaster. The intense heat and jet spray warp the plastic shell and completely dissolve the foam padding. You’ll open it to a melted, misshapen lump.
- The Clothes Dryer. Heat is the enemy of foam and adhesives. The foam will harden and shrink, the plastic may warp, and any glue holding layers together will fail. Your protective equipment becomes a brittle plastic shell.
- Store Them Wet. Tossing damp guards into your dark gear bag is how you grow mold. The smell becomes permanent. Always, always ensure they are bone-dry. This is the single best habit for preventing shin guard sliding as well, as damp sleeves lose their grip.
- Use Bleach or Stain Remover Sprays. These chemicals break down the synthetic materials at a molecular level. They cause discoloration, brittleness, and can even create toxic fumes if mixed with other cleaners.
The Weekly Routine vs. The Seasonal Overhaul
You don’t need to deep-clean after every training session. But you can’t ignore them either.
After Every Use (The 60-Second Habit):
- Remove the guards from your legs.
- Wipe the plastic shells with a dry cloth if muddy.
- Give the foam interior a light spray with your vinegar-water or tea tree oil solution.
- Let them air out, foam-side up, in a well-ventilated space—not at the bottom of your bag.
Every 2-3 Weeks (The Deep Clean): Follow the full 5-step method outlined above. This is the frequency for a player training 2-3 times a week. It maintains hygiene and material integrity.
End of Season (The Inspection & Overhaul): This is your chance to really look. After a thorough clean, examine the plastic shell under good light for hairline cracks, especially around the edges and any stress points. Check the foam for permanent compression or tearing. Feel the straps and Velcro. This inspection will tell you if they’re ready for next season or if you need to start choosing shin guards for a replacement pair. Clean gear is the foundation of looking after all your Hummel soccer apparel and equipment.
Frequently Asked Questions
Can I put my shin guards in the washing machine?
Only if they are the simple, fabric sleeve style with no internal foam padding, and even then, only in a mesh bag on a gentle, cold cycle. For 99% of shin guards—especially any with foam—machine washing will damage them. The agitation destroys the foam and the spin cycle can warp the plastic.
How do I get the mildew smell out of old shin guards?
Start with a prolonged soak (several hours) in cool water with baking soda and detergent. After scrubbing and rinsing, soak them again for an hour in a solution of one part white vinegar to four parts water. Rinse thoroughly. If the smell remains in the foam core after it’s completely dry, the foam is likely degraded and holding the odor permanently. It’s a sign to replace them.
Is it okay to use disinfectant wipes on shin guards?
Yes, but with caution. Use alcohol-based wipes on the hard plastic shells only. Do not use them on the foam padding, as the alcohol and other chemicals can dry out and break down the foam material. For the foam, a diluted vinegar spray is a safer disinfectant.
How long does it take for shin guards to air dry completely?
In a room with good airflow, the plastic shell will feel dry in an hour. The dense foam padding, however, can take a full 24 hours to dry all the way through. If you store them sooner, you risk mildew. When in doubt, wait longer.
Can cleaning my shin guards too often wear them out?
No, proper cleaning does not wear them out. What wears them out is the abrasive dirt and corrosive sweat left sitting on and in the materials. Gentle, regular cleaning with the right tools extends their lifespan by preventing the breakdown of foam and fabric.
Before You Go
Clean shin guards are not about vanity. They are about hygiene, performance, and safety. The process is simple: disassemble, soak, scrub with the right brush, rinse completely, and dry with absolute patience. Skip the heat, skip the harsh chemicals, and never store them damp.
Make the post-game spray and air-out a non-negotiable habit. Schedule the deep clean every few weeks. Your skin will thank you, your gear will last seasons longer, and you’ll never have to apologize for your bag’s aroma again. It’s a small routine that protects your investment and your health on the pitch.

I come from the “soccer heart” of Germany, the Ruhrpott. I have played, trained and followed soccer all my life and am a big fan of FC Schalke 04. I also enjoy following international soccer extensively.