How to Improve Passing Accuracy in Soccer: Drills & Pro Tips
To improve passing accuracy in soccer, you must master five mechanical fundamentals, train under progressive pressure, and develop game-speed decision-making. The core technique uses the inside of your foot, with your plant foot pointing at the target, a locked ankle, and a follow-through that guides the ball. Isolated technique is useless without the habits of scanning, varying pass weight, and playing with both feet.
Most players and coaches get this wrong. They run endless static partner passing drills on a quiet Tuesday night, then wonder why every pass goes astray in a loud Saturday match with a defender breathing down their neck. The disconnect isn’t a lack of skill. It’s a lack of context.
This guide bridges that gap. We’ll break down the non-negotiable mechanics, then build a training plan that forces you to use those mechanics under the same stress you face in a game. You’ll get specific drills, common mistakes with timelines, and the tactical awareness that turns a good passer into a vital player.
Key Takeaways
- Passing accuracy under game pressure drops by up to 25% for untrained players. Your drills must replicate that pressure to be effective.
- Your plant foot is the steering wheel. If it’s not planted beside the ball and pointing at your target, your pass will miss regardless of your striking technique.
- Scan the field every 2-3 seconds. This single habit creates the extra half-second you need to pick the right pass before a defender closes you down.
- Train your weak foot until it’s not weak. A one-footed player is predictable and easy to defend, which clogs passing lanes for your entire team.
- A pass is a conversation. The weight, foot, and angle you choose communicate intent to your teammate just as much as your shout.
The 5-Step Passing Mechanics Checklist
Forget fancy tricks. A clean, repeatable ground pass is built on five points. Miss one, and the pass fails.
Plant foot placement. Place your non-kicking foot about six inches beside the ball. The toe of that plant foot must point directly at your target. This isn’t a suggestion. If your plant foot aims wide, your hips open, and the ball spins away from your teammate. Get this wrong first, and everything else is compensation.
Ankle lock and striking surface. Turn your kicking foot outward to present the flat, inside surface. Pull your toes up and lock your ankle rigid. A wobbly ankle is a wobbly pass. Strike the ball’s middle with the area just above your arch.
Body position and lean. Lean your torso slightly over the ball. Leaning back makes you reach, causing a scooping motion that pops the ball up. A bouncing pass is a hard pass to control. Stay over it.
Contact and follow-through. Your foot should brush through the grass after contact, finishing with your kicking foot pointing at the target. A stabbing “punch” stop creates a choppy, slow pass. Follow through.
First-touch preparation. Your first touch isn’t separate. It sets up the pass. Cushion the incoming ball into the space where your plant foot will naturally step. A bad first touch forces an extra adjustment touch, and that’s when the tackle comes.
The inside-of-the-foot pass provides the largest, flattest striking surface for consistency. The ankle must be locked upon contact to prevent energy loss and off-center spin, which is the primary cause of passes rolling away from a teammate’s path.
TL;DR: Nail plant foot direction and a locked ankle every single time; every other mechanical flaw usually traces back to those two.
Why Does My Pass Keep Missing? (The Fix-It Table)
You know the mechanics, but the ball still doesn’t go where you want. This table matches common symptoms to their root cause and the specific fix. Stop guessing.
| Symptom | Most Likely Cause | Immediate Fix |
|---|---|---|
| Pass rolls right/left | Plant foot not pointing at target | Exaggerate pointing your plant foot toe. Practice without a ball. |
| Pass pops up into the air | Leaning back; striking too low on ball | Keep your chest over the ball. Visualize striking the equator, not the ground. |
| Pass is weak, no pace | Ankle not locked; no follow-through | Freeze in the follow-through position. Your kicking foot should be off the ground, pointing forward. |
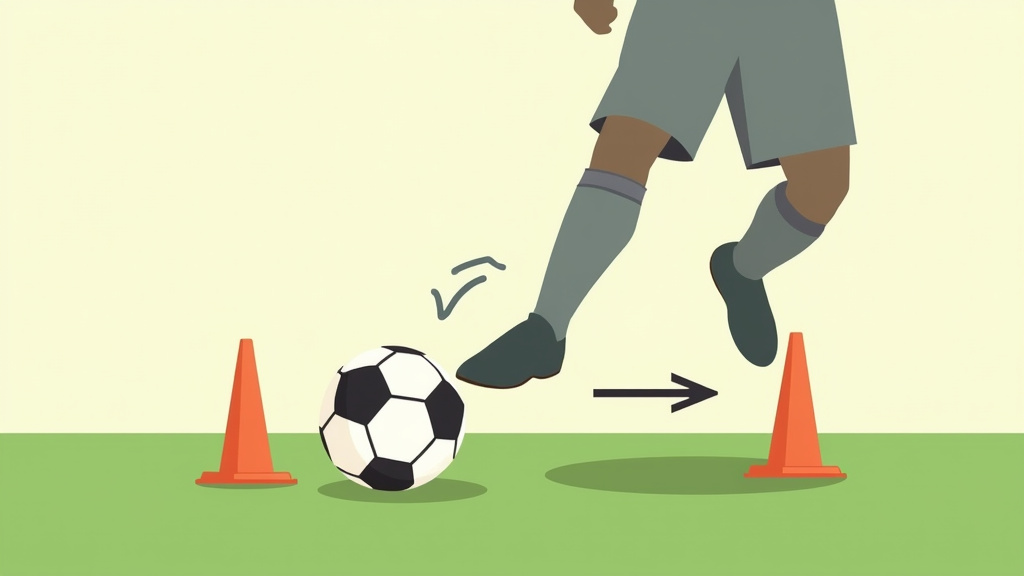
| Pass is inconsistent | Using toes or wrong part of foot | Place a cone 1 foot outside the ball. Practice hitting the ball around the cone with your instep. |
Common mistake: Poking the ball with your toe for a short pass — it feels quick but the surface area is tiny. The ball skids with unpredictable spin, and your teammate’s first touch becomes a tackle. This fails within 10 yards.
The fix isn’t more force. It’s more surface area. The inside of your foot is a paddle. The toe is a pin.
Train Your Brain: Vision and Decision-Making
Your feet can only execute what your brain sees. Technical passing drills without cognitive load create training-ground players who vanish on match day.
Scanning is not optional. Your head should be on a swivel. The benchmark is a scan every 2-3 seconds. Before you receive the ball, your scan tells you two things: the pressure (where is the defender?) and the possibility (where is my teammate?). If you only look at the ball, you only see the pressure.
Play the picture, not the player. Don’t just pass to a teammate. Pass into the space that allows their next move. Is your winger ready to run onto a through ball? Pass ahead of them. Is your striker pinned? Pass to their back foot so they can shield. This is the weight and the foot.
Verbal and visual communication. A pass is a dialogue. A shouted “man on!” tells your teammate to play one-touch. A pointed run into space asks for the ball in front of you. Making eye contact before a switch of play ensures you’re both seeing the same open lane. This is the glue for any advanced passing strategies.
I learned this the hard way playing central midfield in a youth tournament. I had the technique. I’d hit 50 straight passes in warm-ups. In the first half, I kept receiving the ball, taking a touch to look up, and getting swarmed. My coach screamed, “Check your shoulder!” At halftime, he showed me video stills. I was receiving the ball blind. The second half, I scanned early. I knew the pressure before the ball arrived. My pass completion rate probably doubled. The technique was the same. The information was everything.
The 3-Phase Progressive Training Plan
This is where most guides stop. They show you mechanics and a drill or two. That’s like learning vocabulary without grammar. You need a syllabus that builds complexity. Follow this three-phase plan over 4-6 weeks.
Phase 1: Technical Consistency (Low Pressure)
Goal: Groove the mechanics. No defenders, just repetition with focus.
* Gate Passing: Set up two small gates (2 feet wide) with cones 10 yards apart. Partner passing must go through the gate. Focus entirely on plant foot and follow-through. Do 50 passes with your strong foot, then 50 with your weak foot.
* Wall Passing: Find a wall. Pass against it, control the return, pass again. Vary the distance (5, 10, 15 yards) to work on different pass weights. The wall never misses — if your return is bad, your pass was bad.
Phase 2: Pressure Introduction (Limited Time/Space)
Goal: Add defenders and decision-making. This is the critical bridge.
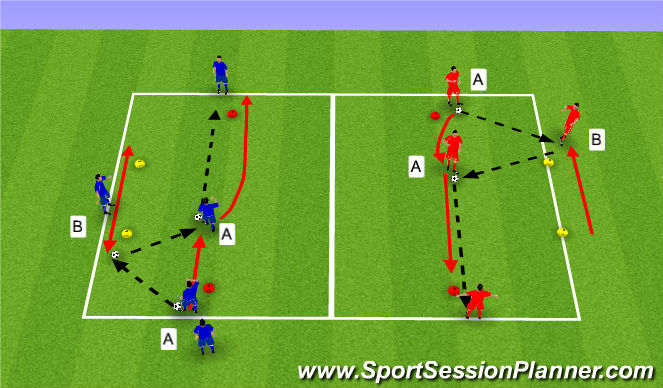
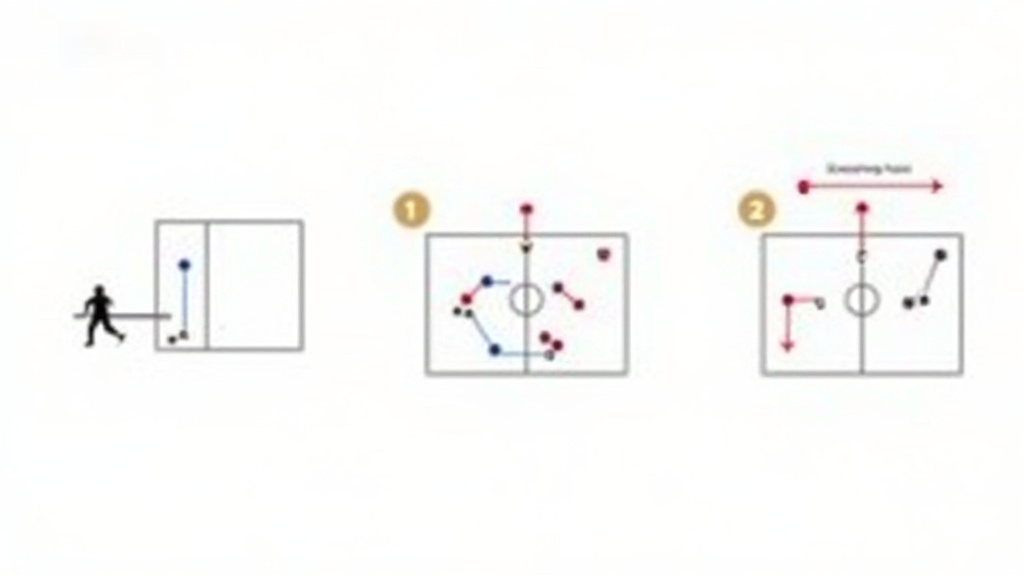
* The Rondo (4v2 / 5v3): The king of passing drills. A small grid (10×10 yards), attackers on the outside, defenders in the middle. The rule: keep possession. This forces quick one- and two-touch passing, constant movement, and scanning to avoid defenders. It’s the heartbeat of teams like Barcelona for a reason.
* Pass & Move Squares: Four players at four cones forming a square. One ball. Pass to any player except the one who passed to you, then immediately sprint to a different cone. It teaches movement after the pass, a habit most amateur players neglect.
Phase 3: Game-Realistic Application (High Pressure)
Goal: Apply skills in match-like conditions. This is the test.
* Conditioned Small-Sided Games: 4v4 or 5v5 in a tight area. Add conditions: two-touch maximum, or a point is only scored after a sequence of 5 consecutive passes. This replicates the fatigue, limited space, and need for combination play of a real match.
* Directional Possession with Transition: Two teams, two small goals. Play normal soccer, but if you score, you must immediately drop back and complete 5 passes in your own half before attacking again. This simulates game transitions and the need to keep accurate passing under mental and physical fatigue.
I prefer a 4v2 rondo to start Phase 2, not a 3v1. The 4v2 creates more passing options and forces defenders to work as a pair to cut lanes, which is more game-realistic. The 3v1 is too easy for the attackers and teaches bad defensive habits.
TL;DR: Start with a wall, progress to a rondo, finish in a small-sided game. If you skip the middle step, you won’t be ready for the last one.
What Drills Actually Work? (And Two That Waste Time)
Not all drills are created equal. Some build game skills. Others just fill practice time. Here’s a comparison of high-value versus low-value passing work.
| Drill Type | What It Builds | Carryover to Games | Best For |
|---|---|---|---|
| Rondo (4v2) | Quick decision-making, scanning, one-touch passing, support angles | Very High | All players, especially midfielders |
| Gate Passing | Pure technical repetition, weight of pass, weak foot | Medium (Needs pressure added later) | Beginners, technical warm-ups |
| Static Line Passing | Almost nothing but muscle memory for a specific distance | Very Low | Wasting the first 10 minutes of practice |
| Long-Ball Tennis | Lofted technique, ball tracking | Low (Rare game situation) | Goalkeepers, center-backs in specific systems |
Your training time is limited. Prioritize drills with defenders, movement, and decision-making. That 20-minute static passing line your coach runs? It’s a social exercise. Politely suggest a rondo instead.
The Weak Foot Mandatory
Relying on one foot is a luxury you cannot afford. It makes you predictable. It forces you into extra touches to shift the ball. Defenders know this. They’ll show you onto your weak side all day long.
How to train it. Start every technical session (Phase 1) by doing your weak-foot reps first. When you’re fresh. Use the wall. Use the gates. Do not move to your strong foot until your weak foot has hit its target count. It will feel awful. The passes will skew. Do it anyway.
The timeline. Expect frustration for two weeks. Around week three, you’ll notice the ball starts going where you aim more often. By week six, you’ll use it in a rondo without a second thought. That’s when you become a different player. This single-minded focus is more valuable than any fancy agility ladder drills for a passer.
Common mistake: Only using your weak foot for light taps in drills — you’re not building the full range of passing. Force yourself to play a 15-yard driven pass with your weak foot. It will be bad. Then do it again. That’s the rep that matters.
Your strong foot is your friend. Your weak foot is your weapon. Sharpen it.
Passing in Different Formations
Your role and passing demands change based on your team’s shape. A defender in a 5-3-2 formation has different options than a winger in a 3-4-3 formation. Understand the system.
- In a 4-3-3: Central midfielders are the hub. Your passing must be sharp, vertical, and progressive to feed the front three. You have less time, as you’re often the link between defense and attack.
- In a 4-4-2: The midfield partnership is key. Passing is often about quick combinations with your partner and switching play to the wide midfielders. It’s more about reliability than risk.
- In a 3-5-2: The wing-backs are your primary outlet. Your passing from the center-backs or midfield must be crisp and into the space ahead of them. Long, diagonal switches are a high-value pass in this system.
Knowing your formation tells you which pass is the right pass. A safe square ball in a 4-4-2 might be a missed opportunity in a 4-3-3. Study your team’s principles of play.
Gear That Helps (And What Doesn’t)
You can’t buy passing accuracy. But the right tools can remove barriers.
The ball. Use a match-quality ball, size appropriate for your age (Size 5 for adults). A flat, waterlogged ball behaves unpredictably. It’s not you.
Footwear. This matters more than you think. Wearing firm-ground cleats (FG) on a wet, soft pitch means no traction. You’ll slip as you plant your foot, ruining your pass. Match your soccer cleat types to the surface. Good traction equals a stable platform.
Training aids. A soccer rebounder is fantastic for solo work on first touch and quick return passing. It’s a relentless partner. Cones and discs are all you need for most drills. Fancy gadgets rarely help more than a wall and a friend.
Ignore the marketing. A $300 “smart ball” won’t fix your plant foot. A wall and focused repetition will.
Frequently Asked Questions
How long does it take to see real improvement in my passing?
If you follow a structured plan like the 3-phase model, you’ll see technical improvement in controlled drills within 2-3 weeks. The real test — applying it in a game — takes 6-8 weeks of consistent, focused training. The delay is your brain catching up to your muscles under pressure.
What’s more important, passing accuracy or power?
Accuracy, always. A perfectly weighted, accurate pass to a teammate’s foot is more valuable than a 50-yard rocket that skips out of play. Power without placement is a turnover. Develop power later, as an add-on for specific long passes.
I get nervous and rush my passes in games. How do I fix that?
You’re not nervous. You’re unpracticed under pressure. The solution is in Phase 2 of the training plan. Do more rondos and small-sided games where a defender is actively trying to win the ball. Your brain will learn to make decisions faster. Game day then feels like just another rondo, not a crisis.
Can I improve my passing by myself?
Absolutely. Wall passing is the best solo drill. Work on both feet, different distances, and one-touch returns. Add a soccer rebounder for varied angles. The key is to be intentional: focus on a technical cue (like “plant foot”) every session, don’t just mindlessly kick the ball.
How does my first touch affect my passing?
Your first touch is the foundation of the pass. A heavy touch pushes the ball too far, forcing a recovery run and killing your passing angle. A cushioning touch that dies under your feet makes you static. The ideal first touch pops the ball into the space where your plant foot will step, setting your body perfectly for the next action. They are one fluid motion.
The Bottom Line
Improving your passing isn’t a mystery. It’s a project. Lock down the five mechanical non-negotiables — especially that plant foot. Then, stop practicing in a vacuum. Force yourself into drills with defenders, limited touches, and required movement. That’s where real passing is born.
Remember, a good pass isn’t just about where the ball goes. It’s about the weight that makes it easy to control, the foot that tells your teammate which way to turn, and the vision that saw the opportunity before anyone else. Work on the technique, then put it under pressure. The game is the only test that counts.

I come from the “soccer heart” of Germany, the Ruhrpott. I have played, trained and followed soccer all my life and am a big fan of FC Schalke 04. I also enjoy following international soccer extensively.