Inflate Soccer Ball Correctly: Step-by-Step Pressure Guide
To inflate a soccer ball to the correct pressure, you need three things: the target PSI (printed on the ball or from FIFA’s 8.5–15.6 PSI range), a pump with a ball needle, and a pressure gauge. Lubricate the needle, insert it straight into the valve, and pump slowly while checking the gauge until you hit your number.
Most people ruin a ball’s feel and lifespan in the first five minutes of ownership. They jam a dry needle in at an angle, pump until the ball feels “hard,” and call it done. The valve gets scored, the bladder shifts, and the ball plays like a brick for the rest of its short life.
This guide walks through the exact pressure specs, the physical why behind each step, and the adjustments for heat, cold, and altitude that keep a ball playing right season after season.
Key Takeaways
- The official correct PSI for a size 5 match ball is between 8.5 and 15.6 PSI per FIFA, but most leagues and players prefer 11–13 PSI for optimal control and flight.
- Never insert a dry inflation needle. Lubricate it with water or glycerin every single time to prevent valve damage and air leaks.
- Always use a dedicated pressure gauge to check inflation. The “squeeze test” is wildly inaccurate and leads to overinflation.
- Air expands when hot and contracts when cold. Inflate 1-2 PSI below your target on a hot day, and 1-2 PSI above on a cold day.
- For long-term storage, deflate the ball slightly to relieve stress on the seams and bladder, which prevents permanent deformation.
Why Air Pressure Dictates Everything
Air pressure isn’t just a number. It’s the single variable that controls a ball’s bounce, flight stability, and touch. Get it wrong, and even a $200 match ball behaves like a cheap plastic toy.
Overinflation makes the ball too lively. It skips off the grass, bounces unpredictably on the first touch, and feels like kicking a rock. That hard surface also transfers more impact shock to a player’s foot and ankle. Underinflation creates a dead, mushy feel. The ball won’t travel as far, loses its crisp bounce, and becomes harder to strike cleanly. Passes drag and shots lack zip.
The ball’s construction explains this. A soccer ball is a latex or butyl rubber bladder wrapped in layers of polyester and cotton, all encased in a synthetic leather outer. The air pressure inside tensions this entire assembly. Correct pressure makes the outer casing taut and responsive. Incorrect pressure lets the materials flex in wrong ways, killing the energy transfer from your foot to the ball’s trajectory.
TL;DR: PSI controls the ball’s physical response. Wrong pressure means wrong bounce, wrong flight, and wrong feel.
Finding Your Exact Target PSI
Forget guessing. Your ball or the rulebook holds the answer.
First, check the ball itself. Most manufacturers print the recommended pressure range on a panel, often near the valve stem. It might say “Inflate to 0.6–1.1 bar” or “8.5–15.6 PSI”. Use that as your primary guide. If there’s no printing, default to the FIFA Laws of the Game.
The FIFA standard for match balls (sizes 3, 4, and 5) is an inflation pressure between 0.6 and 1.1 atmospheres at sea level, which converts to 8.5 and 15.6 pounds per square inch (PSI).
That’s a wide range for a reason. It accommodates different leagues, playing styles, and conditions. The English Premier League recommends 8.7–16.0 PSI. Major League Soccer mandates 13 PSI for its matches. For training and casual play, most coaches and experienced players land on 11–13 PSI. This middle ground offers a balanced bounce, good flight stability, and a comfortable striking surface.
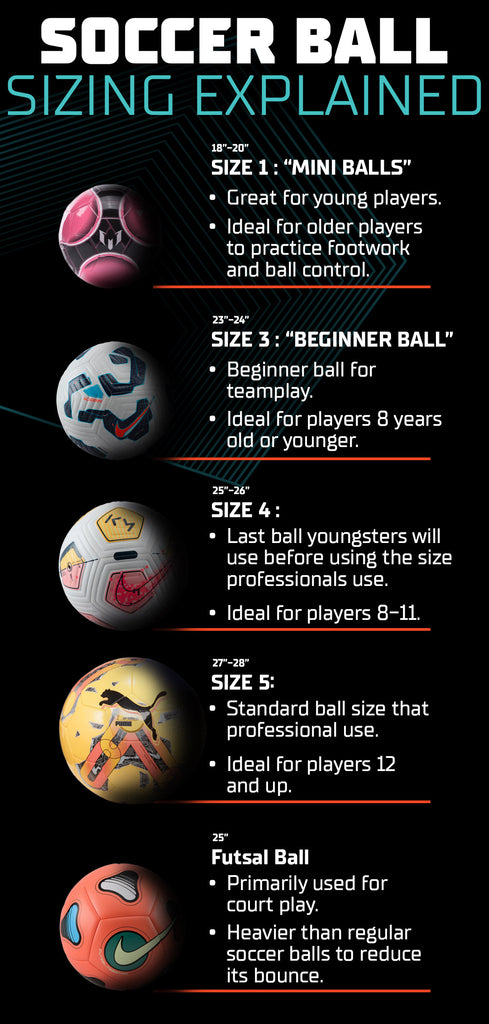
Here’s a quick reference for different ball sizes and their typical use cases:
| Ball Size | Age Group | Common PSI Range | Primary Use Case |
|---|---|---|---|
| Size 3 | Under 8 | 8.5 – 15.6 PSI | Skills training, small-sided games |
| Size 4 | Under 12 (U8-U12) | 8.5 – 15.6 PSI | Youth matches, technical training |
| Size 5 | U12 and above, Adult | 8.5 – 15.6 PSI | Official matches, all senior training |
Your personal preference matters within these frames. A midfielder who plays short, sharp passes on the ground might prefer a ball at 11 PSI for its softer touch. A goalkeeper practicing long goal kicks might want it at 13 PSI for more rebound and distance. Start in the middle and adjust based on feel.
The 3-Step Inflation Process
This is where most guides overcomplicate it. You need a pump with a soccer ball needle attachment, a pressure gauge, and a lubricant. The process is methodical, not difficult.
Step 1: Lubricate the Needle
This step is non-negotiable. The inflation needle is a thin, hard metal pin. Forcing it dry into the soft rubber or silicone valve scores the material. Those tiny cuts become permanent leaks.
Common mistake: Inserting a dry needle, it micro-cuts the valve seal, and the ball will lose 1-2 PSI overnight, requiring weekly top-ups.
Moisten the needle. A drop of water from your finger works. A tiny dab of glycerin is better, it lubricates without evaporating. Some pros even use a bit of saliva in a pinch. The goal is to eliminate friction during insertion and removal.
Step 2: Insert the Needle Straight
Find the valve, the small, rubber-covered hole on the ball. Push the lubricated needle directly into its center. Do not angle it. Do not wiggle it.
Angled insertion is the main cause of a punctured bladder. The needle can slip past the valve mechanism and spear the inner latex tube. If you feel sudden, strong resistance, stop. You’re hitting the bladder. Withdraw the needle, re-lubricate, and try again with a perfectly straight approach.
Step 3: Pump Slowly and Check with a Gauge
Attach your pump. Add air in short, controlled strokes. After every 3-4 pumps, detach the pump and check the pressure with your gauge. This is critical.
Pumping blind leads to overinflation. A few extra strokes can push a ball from 12 PSI to 16 PSI, which is enough to stress seams. Use a digital gauge for the easiest reading, or a reliable analog dial gauge. The cheap gauges on some pump handles are often inaccurate, trust a standalone tool.
Stop the moment you hit your target number. Remove the needle with a straight pull. You’re done.
TL;DR: Lube needle, insert straight, pump slowly with gauge checks. Force or speed breaks things.
Tools You Actually Need (And One to Avoid)
Your garage likely has the wrong pump. A bicycle pump with a Presta valve head won’t fit. You need the right tools for a clean, damage-free job.
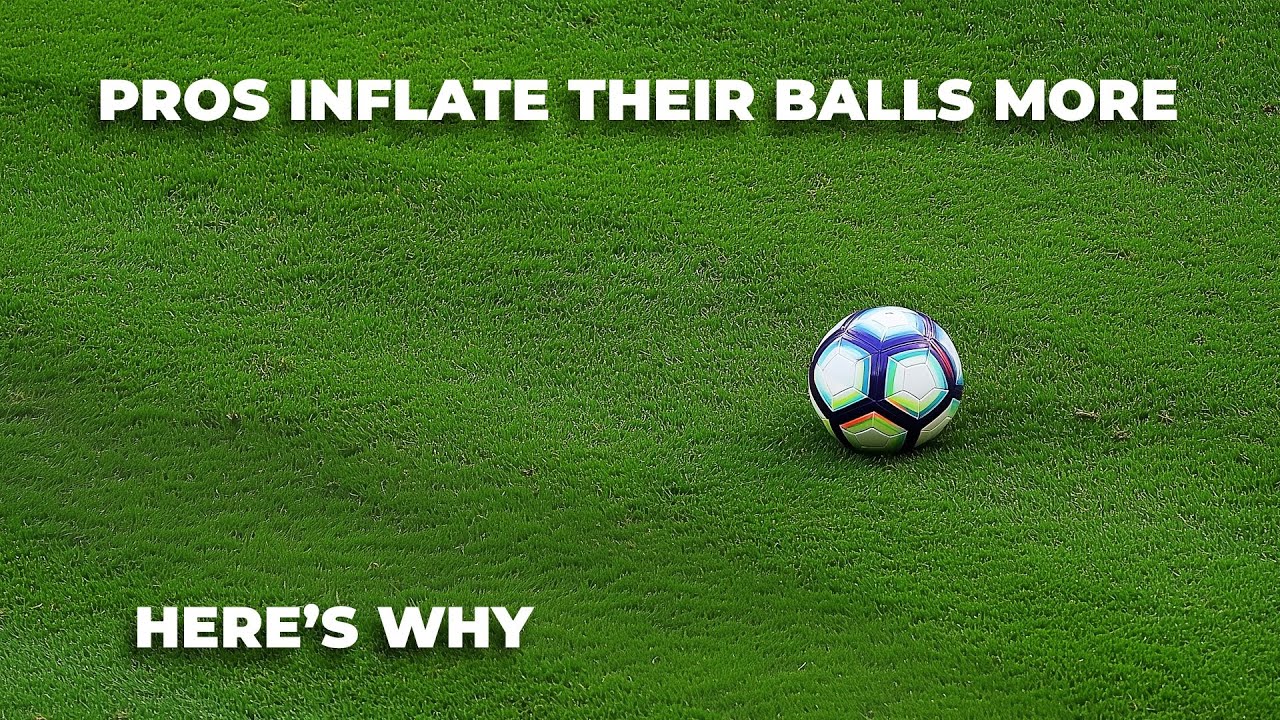
- Hand Pump with Ball Needle: The basic, reliable choice. Look for a dual-action pump (inflates on both push and pull) to save time. Ensure it comes with a dedicated soccer ball needle.
- Digital Pressure Gauge: This is your truth-teller. A good digital gauge reads to within 0.5 PSI. It removes all guesswork from the process.
- Lubricant: A small bottle of pure glycerin from a pharmacy is a lifetime supply. Water works but can dry out.
- Electric Ball Pump: A luxury for teams or frequent users. These often have auto-shutoff at a set PSI, which is brilliant for consistency. Just set it and forget it.
Avoid using gas station air compressors. Their pressure is immense and uncontrolled. You can burst a bladder in two seconds. I learned this the hard way trying to inflate a team set of Select Numero 10 balls before a tournament. The compressor hose blasted one ball to what felt like 20 PSI before I could react. The seam along one panel started bulging within an hour, and it was unusable by the next day.
I keep a digital gauge in my training bag. The one that came with my pump read 2 PSI high. I spent a season wondering why my teams’ first touches were so heavy until I cross-checked with a proper tool.
How Temperature and Altitude Warp Your PSI
The number on your gauge is only true for that moment in that place. Physics changes it immediately.
Air expands when heated and contracts when cooled. A ball inflated to a perfect 12 PSI in a 70°F (21°C) locker room will gain over 1 PSI if left in direct 90°F (32°C) sun. That pushes it into the overinflated zone. Conversely, that same ball will drop below 11 PSI on a 40°F (4°C) morning pitch, feeling sluggish.
The rule is simple: inflate for where the ball will be played.
* Hot Weather/Indoors: Inflate 1-2 PSI below your target pressure. The ambient heat will bring it up to the correct level.
* Cold Weather: Inflate 1-2 PSI above your target. The cold air contraction will bring it down to the correct level.
Altitude works the same way. Atmospheric pressure is lower at high elevation. A ball inflated to 12 PSI at sea level will feel harder and overinflated in Denver. For play above 3,000 feet, reduce your target PSI by 1-2 points to compensate.
| Condition | Effect on Air | Your Adjustment | If You Skip It |
|---|---|---|---|
| Hot, Sunny Day | Expands | Inflate 1–2 PSI below target | Ball becomes overinflated, bouncy, and unpredictable within 30 mins. |
| Cold, Early Morning | Contracts | Inflate 1–2 PSI above target | Ball feels dead, passes fall short, bounce is inconsistent. |
| High Altitude | Lower outside pressure | Inflate 1–2 PSI below sea-level target | Ball feels rock-hard and travels farther than intended. |
Checking Pressure Without a Gauge (The Last-Resort Methods)
You forgot your gauge. The game starts in ten minutes. Use these methods only in a true pinch, they are diagnostic, not precise.
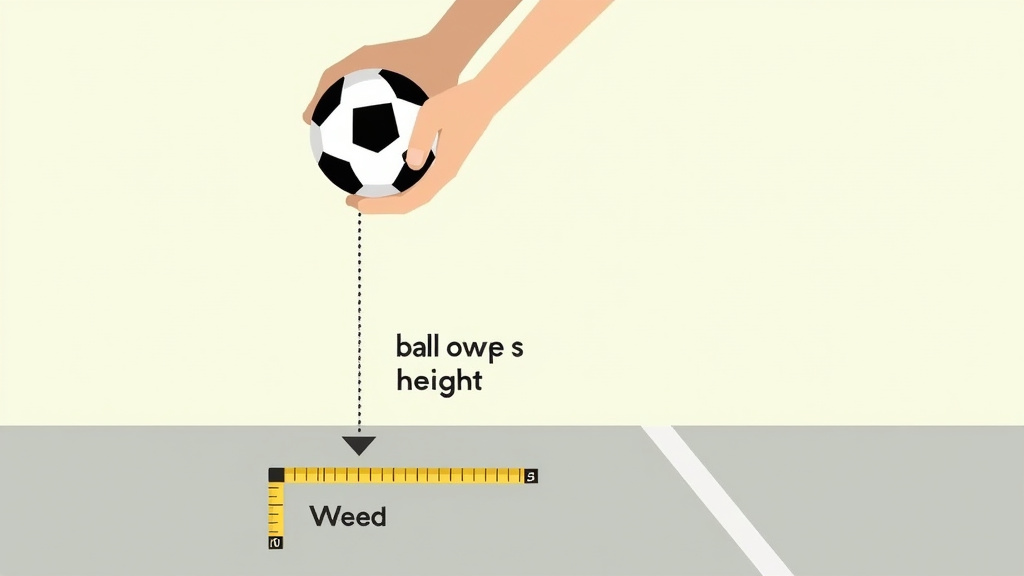
The bounce test is the better informal check. Drop the ball from shoulder height (roughly 80 inches) onto a hard, flat surface like concrete. A properly inflated ball should rebound to between 45 and 64 inches, about knee-to-waist height on an adult. If it bounces higher, it’s likely overinflated. Lower, and it’s underinflated.
The squeeze test is nearly useless. Pushing with your thumbs tests the ball’s outer material stiffness as much as its internal pressure. A ball with a stiff synthetic casing will feel hard even when underinflated.
These tests can’t tell the difference between 11 PSI and 13 PSI, which is the difference between a midfielder’s preference and a goalkeeper’s. They only flag extreme over- or under-inflation. For any serious play or consistent training, a pressure gauge is non-negotiable equipment.
Post-Inflation Care and Troubleshooting
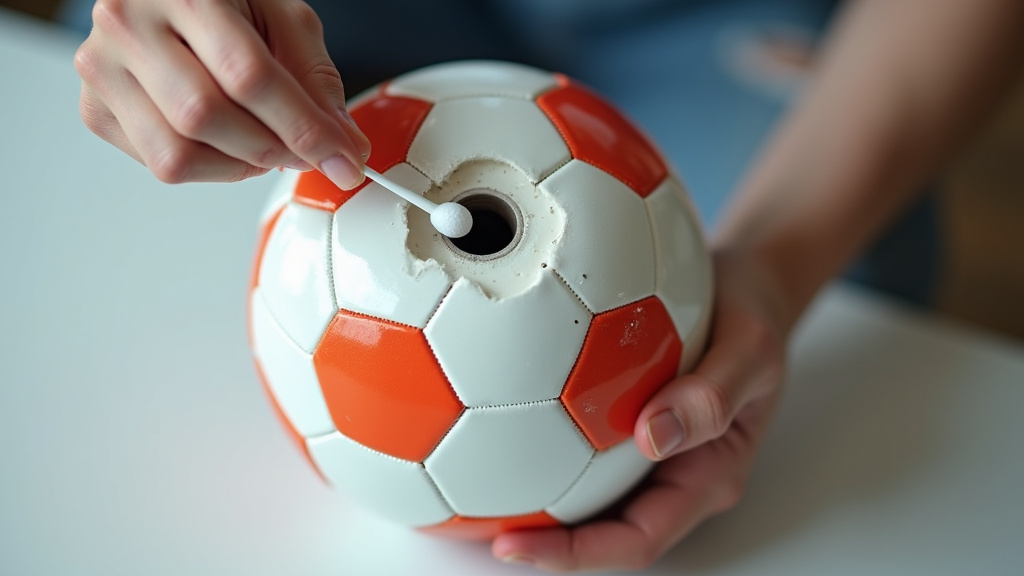
Your job isn’t over when the needle comes out. How you treat the ball afterward determines its longevity.
Always store an inflated ball at room temperature, away from direct heat sources like radiators or car trunks. Extreme heat degrades the latex bladder and the glue holding the panels. For long-term storage, like the offseason, deflate the ball to about half pressure. This relieves constant tension on the seams and bladder, preventing permanent stretching or deformation.
Common mistake: Storing a fully inflated ball in a cold garage over winter, the repeated contraction and expansion from daily temperature swings fatigue the bladder, and it will develop a slow leak by spring.
What if the ball won’t hold air? The problem is usually the valve. Dirt or dried saliva can clog it. Try cleaning the valve with a cotton swab dipped in a drop of glycerin. If air still leaks, the valve may need replacement, some higher-end balls have replaceable valve cores. A persistent leak from a panel seam or puncture in the bladder itself is often a death sentence for cheaper training balls, but can sometimes be repaired with a bladder patch kit from the inside.
This is why understanding ball construction matters. A butyl rubber bladder holds air longer than latex, but latex offers better feel. Your inflation and maintenance routine should match what’s inside.
Regular ball maintenance routine, including wiping it down after wet matches and checking pressure weekly, is part of the same system. It extends the life of any ball, from a basic training ball recommendations model to a top-tier performance soccer balls.
Frequently Asked Questions
What happens if I overinflate my soccer ball?
Overinflation stresses the ball’s seams and bladder, leading to premature failure. It also makes the ball too bouncy and hard to control. In extreme cases, the panels can bulge or the bladder can burst. Always use a gauge.
Can I use a bike pump to inflate a soccer ball?
Only if you have the correct adapter, a soccer ball needle. Standard bike pump heads (Presta or Schrader) will not fit the ball’s valve. Most hand pumps for balls include this needle.
How often should I check the air pressure in my soccer ball?
Check it before every session if you play competitively. For casual use, once a week is sufficient. Temperature changes alone can alter pressure by 1-2 PSI, so regular checks are part of basic general gear maintenance.
Why does my new soccer ball keep losing air?
small amount of air loss (1-2 PSI per week) is normal, especially with latex bladders which are slightly porous. Rapid air loss indicates a problem: a dry-needle damaged valve, a loose valve core, or a puncture. Inflate the ball and listen for a hiss or submerge it in water to look for bubbles.
Is there a difference between inflating a match ball and a training ball?
The process is identical. However, the target PSI might differ based on ball type differences. Match balls are often inflated to the higher end of the range for maximum responsiveness, while training balls might be kept slightly lower for durability and a softer feel during repeated strikes.
What is the correct ball size for an adult?
Adults and players aged 12 and up use a size 5 ball. This is the standard for all professional and international matches.
The Bottom Line
Inflating a soccer ball correctly is a five-minute task with a two-year impact. Find your PSI on the ball or use the 12 PSI sweet spot. Lubricate the needle every time. Use a gauge every time. Adjust for heat, cold, and altitude.
That’s it. The difference between a ball that feels like an extension of your foot and one that fights you is often just 2 pounds of air pressure. Get the basics right, and your proper ball storage and care will keep it playing right for hundreds of hours.

I come from the “soccer heart” of Germany, the Ruhrpott. I have played, trained and followed soccer all my life and am a big fan of FC Schalke 04. I also enjoy following international soccer extensively.